Take it 'Without' a Grain of Salt


6/20/10: Grilled Hot Dogs with Foil Packed Potatoes and Beets. Accompanied with Marshmallows on a Stick. ;)
Meal details: For this Sunday we started up the grill for the first time this year and grilled hot dogs, potatoes, beets, and of course, marshmallows.
Defining moments: This is a pretty standard outdoor menu (see my previous post for evidence), so nothing new for me this week!
Recipe sources: No recipe is needed this time. But for those who are wondering what I do to prepare the beets, here are some quick directions for you. Let me point out that I do the beets a couple ways.
Quick Grilled Beets
Remove leaves from beets and clean under running water. Peel and slice beets into quarters; if your beets are on the smaller side, keep them whole. Place beets in pot and fill with enough water to cover. Bring to boil and boil for ten minutes. Drain into colander and transfer to a long sheet of aluminum foil. Wrap into small packages and seal securely. Don't make packages too large, you need to maneuver them easily when grilling! With tongs, move packages to prepared grill and place over indirect heat. Grill for 10-20 minutes, or until fork tender.
Smokey Grilled Beets (direct approach)
This method gives more of a char flavor to the beets because of the sear that is gained from exposing them to direct heat.
Remove leaves from beets and clean under running water. Peel beets and keep whole. With tongs, place beets on grill over indirect heat. Grill for 30 minutes or until fork tender. Move beets to direct heat and grill for 10 minutes more.
What I learned: I learned a few tips this week. To start, the grill takes about 30 minutes to get up to temperature, the potatoes take an hour and a half to cook, it is a much better idea to baste the hot dogs with BBQ sauce during the last few minutes than ahead of time, I should have used Pam for Grilling, and. . . I think that's it. :D
Any modifications? None at all.
How did it taste? With all those fresh veggies and charred hot dogs, how can you not say, "Wonderful"? Everything was so flavorful that I begin to wonder how food, with no seasoning such as salt, can taste soooo good.
How about a 2nd time? As we dive deeper into the farming season, I'm not sure if we can heat up the grill again any time soon. We have to see.
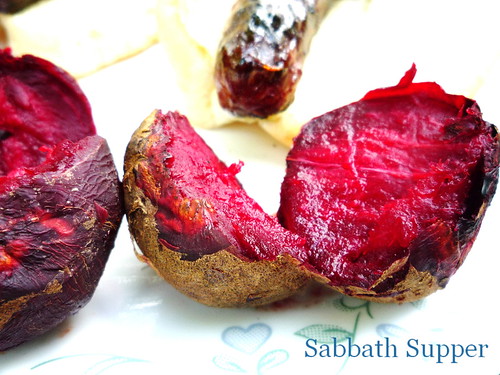
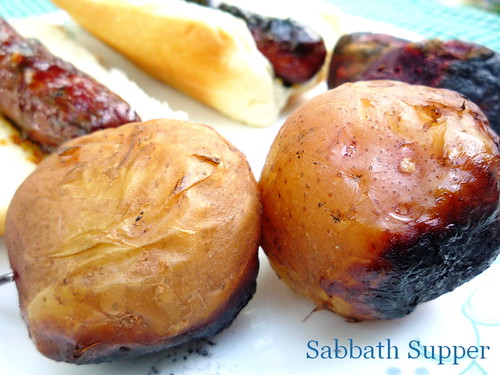
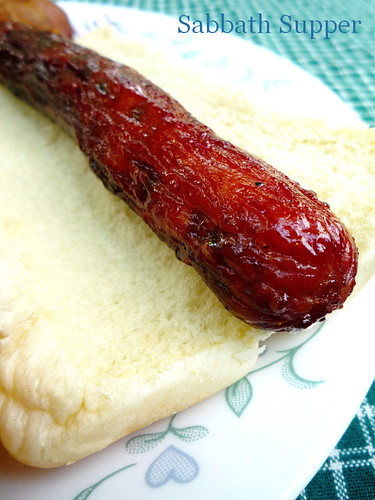
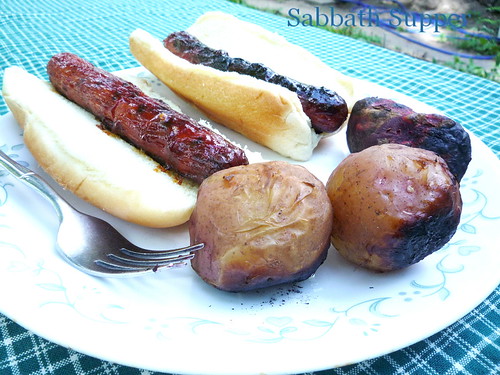
Meal details: For this Sunday we started up the grill for the first time this year and grilled hot dogs, potatoes, beets, and of course, marshmallows.
Defining moments: This is a pretty standard outdoor menu (see my previous post for evidence), so nothing new for me this week!
Recipe sources: No recipe is needed this time. But for those who are wondering what I do to prepare the beets, here are some quick directions for you. Let me point out that I do the beets a couple ways.
Quick Grilled Beets
Remove leaves from beets and clean under running water. Peel and slice beets into quarters; if your beets are on the smaller side, keep them whole. Place beets in pot and fill with enough water to cover. Bring to boil and boil for ten minutes. Drain into colander and transfer to a long sheet of aluminum foil. Wrap into small packages and seal securely. Don't make packages too large, you need to maneuver them easily when grilling! With tongs, move packages to prepared grill and place over indirect heat. Grill for 10-20 minutes, or until fork tender.
Smokey Grilled Beets (direct approach)
This method gives more of a char flavor to the beets because of the sear that is gained from exposing them to direct heat.
Remove leaves from beets and clean under running water. Peel beets and keep whole. With tongs, place beets on grill over indirect heat. Grill for 30 minutes or until fork tender. Move beets to direct heat and grill for 10 minutes more.
What I learned: I learned a few tips this week. To start, the grill takes about 30 minutes to get up to temperature, the potatoes take an hour and a half to cook, it is a much better idea to baste the hot dogs with BBQ sauce during the last few minutes than ahead of time, I should have used Pam for Grilling, and. . . I think that's it. :D
Any modifications? None at all.
How did it taste? With all those fresh veggies and charred hot dogs, how can you not say, "Wonderful"? Everything was so flavorful that I begin to wonder how food, with no seasoning such as salt, can taste soooo good.
How about a 2nd time? As we dive deeper into the farming season, I'm not sure if we can heat up the grill again any time soon. We have to see.
Herb School
6/13/10: Smoked Salmon, Sugar Snap Peas and Pasta
Meal details: This meal's sole dish had sugar snap peas, bow tie pasta, a mustard vinaigrette, tuna, and parsley.
Defining moments: This was a really easy meal to put together and I can't think of any "death defining" moments!
Recipe sources: This recipe comes from Michele Urvater, the host of Food Network's Feeding Your Family on $99 a Week. I never seen or heard of this show before so I think it must have aired pre-2001. . . The year my family switched to satellite tv. ;D
What I learned: OK, I should mention here that I haven't used many fresh herbs before. I wanted to point this out before I say that I didn't cut my parsley expertly. hehe. I noticed a few hard to chew stems in the salad. So, next time I WILL PAY CLOSER ATTENTION TO THOSE STEMS!
Any modifications? Didn't have any smoked salmon on hand (hard to believe, huh?), so I substituted it with tuna. And I used garlic scapes in replace of the green onion. And oh yeah, I used the balsamic vinaigrette from the week before for the mustard vinaigrette.
How did it taste? Besides those parsley stems, it was a delicious pasta salad. Light and refreshing. . . Perfect for June.
How about a 2nd time? Yes, I will do this recipe again.
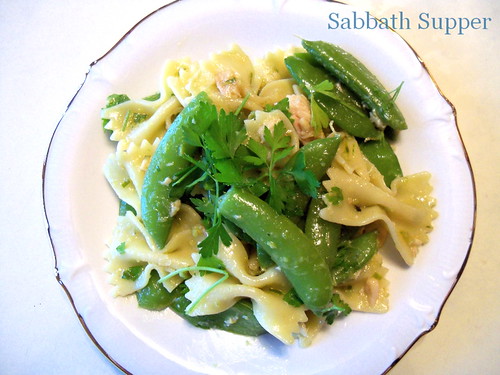
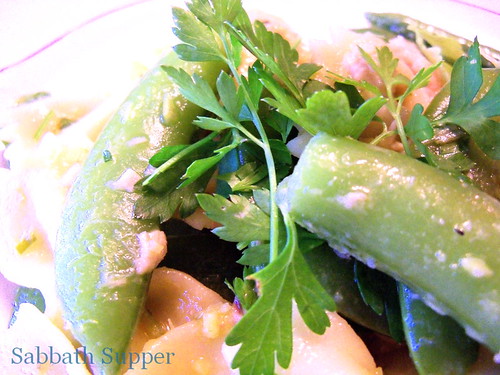
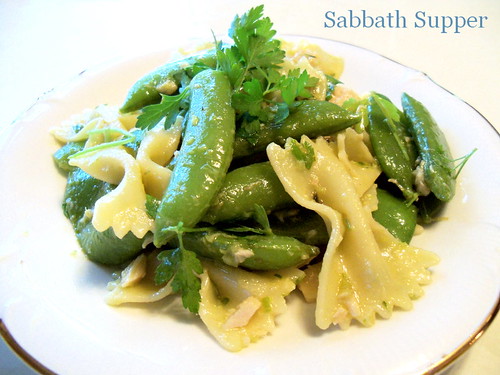
Meal details: This meal's sole dish had sugar snap peas, bow tie pasta, a mustard vinaigrette, tuna, and parsley.
Defining moments: This was a really easy meal to put together and I can't think of any "death defining" moments!
Recipe sources: This recipe comes from Michele Urvater, the host of Food Network's Feeding Your Family on $99 a Week. I never seen or heard of this show before so I think it must have aired pre-2001. . . The year my family switched to satellite tv. ;D
What I learned: OK, I should mention here that I haven't used many fresh herbs before. I wanted to point this out before I say that I didn't cut my parsley expertly. hehe. I noticed a few hard to chew stems in the salad. So, next time I WILL PAY CLOSER ATTENTION TO THOSE STEMS!
Any modifications? Didn't have any smoked salmon on hand (hard to believe, huh?), so I substituted it with tuna. And I used garlic scapes in replace of the green onion. And oh yeah, I used the balsamic vinaigrette from the week before for the mustard vinaigrette.
How did it taste? Besides those parsley stems, it was a delicious pasta salad. Light and refreshing. . . Perfect for June.
How about a 2nd time? Yes, I will do this recipe again.
Green with Envy -- Fresh Arugula Salad from My Garden
6/6/10: Pineapple Pork Chops with Arugula Salad with Shaved Parmesan and Balsamic Vinaigrette
Yeah, it has been awhile since my last Sabbath Supper post but at least I'm posting now, right? ;)
Meal details: The star of the meal was the pork chops in a pineapple sauce. Alongside the chops, I served arugula salad with a balsamic based vinaigrette.
Defining moments: First time using an ingredient from my small herb/arugula/spinach/bulb fennel garden! It is also my first time tasting arugula.
Recipe sources: The pineapple pork chop recipe came from allrecipes.com and the arugula salad came from Emeril Lagasse.
What I learned: Having seen arugula so often on Food Network I wanted to give this green a try. It is a very fast grower (it sprouted only three days after sowing), and has a peppery bite to it. Very interesting!
Any modifications? Yes, I made some to the arugula salad. Since I didn't have fresh garlic on hand, I used a couple garlic scapes and blended the vinaigrette in the blender. And I also substituted mozzarella cheese for the parmesan.
How did it taste? The pork chops had good flavor but they weren't as tender as we expected. I am still trying to figure out the perfect way to cook chops so there is still need for experimentation and research. Right now I am thinking that I had the dutch oven temperature too high or maybe I cooked them for too long of period. I'm scratching my head!
The salad was very good, though! I liked the subtle flavor of the garlic scapes and the zip of the vinegar.
How about a 2nd time? I don't think I will try the pineapple recipe again, but I do want to give chops another go. The arugula salad is definitely a winner!


Just a side note. . . These photos weren't taken by my normal photographer (my sister). She was at a ballgame so I had my Papa fill in for her. Thanks for your help, Papa! :D
Yeah, it has been awhile since my last Sabbath Supper post but at least I'm posting now, right? ;)
Meal details: The star of the meal was the pork chops in a pineapple sauce. Alongside the chops, I served arugula salad with a balsamic based vinaigrette.
Defining moments: First time using an ingredient from my small herb/arugula/spinach/bulb fennel garden! It is also my first time tasting arugula.
Recipe sources: The pineapple pork chop recipe came from allrecipes.com and the arugula salad came from Emeril Lagasse.
What I learned: Having seen arugula so often on Food Network I wanted to give this green a try. It is a very fast grower (it sprouted only three days after sowing), and has a peppery bite to it. Very interesting!
Any modifications? Yes, I made some to the arugula salad. Since I didn't have fresh garlic on hand, I used a couple garlic scapes and blended the vinaigrette in the blender. And I also substituted mozzarella cheese for the parmesan.
How did it taste? The pork chops had good flavor but they weren't as tender as we expected. I am still trying to figure out the perfect way to cook chops so there is still need for experimentation and research. Right now I am thinking that I had the dutch oven temperature too high or maybe I cooked them for too long of period. I'm scratching my head!
The salad was very good, though! I liked the subtle flavor of the garlic scapes and the zip of the vinegar.
How about a 2nd time? I don't think I will try the pineapple recipe again, but I do want to give chops another go. The arugula salad is definitely a winner!


Just a side note. . . These photos weren't taken by my normal photographer (my sister). She was at a ballgame so I had my Papa fill in for her. Thanks for your help, Papa! :D
Canning and Freezing Episode 3 : Asparagus
6/18/10: Freezing Asparagus
Let me set the records straight. . . No, my family does not grow asparagus. There, done with that. Oh, I should also mention that we have tried! We must have tried to grow every fruit and veggie on earth; have to keep things interesting, ya know. ;D
A friend of ours who owns an asparagus farm in Oceana county gave us a large box of them yesterday and so today I pulled out a ton a big pots and got to work.
How to freeze asparagus: I went to my old faithful Ball Book once again and these are the instructions I found:
Select young, tender asparagus with tightly closed tips. Wash thoroughly and sort into sizes. Trim stalks by removing scales with a sharp knife. Cut into even lengths to fit freezer containers. Blanch small spears 1 1/2 minutes, medium spears 2 minutes and large spears 3 minutes. Cool. Drain. Pack asparagus into plastic freezer bags, can-or-freeze jars, plastic freezer boxes or vacuum package. Seal, label and freeze.
That is exactly how I froze them.
Freezing Details: I froze 2 gallon bags of whole spears, 1 quart bag of trimmed spears, and 2 quart bags of chopped asparagus.


Let me set the records straight. . . No, my family does not grow asparagus. There, done with that. Oh, I should also mention that we have tried! We must have tried to grow every fruit and veggie on earth; have to keep things interesting, ya know. ;D
A friend of ours who owns an asparagus farm in Oceana county gave us a large box of them yesterday and so today I pulled out a ton a big pots and got to work.
How to freeze asparagus: I went to my old faithful Ball Book once again and these are the instructions I found:
Select young, tender asparagus with tightly closed tips. Wash thoroughly and sort into sizes. Trim stalks by removing scales with a sharp knife. Cut into even lengths to fit freezer containers. Blanch small spears 1 1/2 minutes, medium spears 2 minutes and large spears 3 minutes. Cool. Drain. Pack asparagus into plastic freezer bags, can-or-freeze jars, plastic freezer boxes or vacuum package. Seal, label and freeze.
That is exactly how I froze them.
Freezing Details: I froze 2 gallon bags of whole spears, 1 quart bag of trimmed spears, and 2 quart bags of chopped asparagus.


Canning and Freezing Episode 2 : Strawberries
6/17/10: Freezing Strawberries
I froze four quarts of strawberries last year and I had them for, guess what, my January birthday! :) I never ever had them at such a time of year so that was real special.
How to freeze strawberries: Last year I froze them following the Ball Blue Book of Preserving instructions. The book included four choices: dry pack, sugar pack, syrup pack, and puree. I decided on doing two quarts with the sugar pack and two quarts with the syrup. When we tasted the berries months later I didn't notice much of a difference between the two. The syrup quarts could have been sweeter but that is all I could detect.
So for this year I went with the sugar pack method. . . It is the easiest one to do and is basically what we do whenever we prepare berries for shortcake or ice cream!
If you want to try freezing your own, I have the Ball instructions here in a previous post of mine.
Freezing Details: I froze two quarts of strawberries.

I froze four quarts of strawberries last year and I had them for, guess what, my January birthday! :) I never ever had them at such a time of year so that was real special.
How to freeze strawberries: Last year I froze them following the Ball Blue Book of Preserving instructions. The book included four choices: dry pack, sugar pack, syrup pack, and puree. I decided on doing two quarts with the sugar pack and two quarts with the syrup. When we tasted the berries months later I didn't notice much of a difference between the two. The syrup quarts could have been sweeter but that is all I could detect.
So for this year I went with the sugar pack method. . . It is the easiest one to do and is basically what we do whenever we prepare berries for shortcake or ice cream!
If you want to try freezing your own, I have the Ball instructions here in a previous post of mine.
Freezing Details: I froze two quarts of strawberries.

Canning and Freezing Episode 1 : Garlic Scapes
6/11/10: Freezing Garlic Scapes
It is harvest time here and you know what that means. . . Lots of canning and freezing! The first item up is garlic scapes. For those who are scratching their heads right now, a garlic scape is a shoot from the garlic plant that grows from the base of the plant around the beginning of June. This shoot, which starts out straight and then turns into a lovely tendril, can blossom and will cause the plant to go to seed. That is why it is important to have it removed before it flowers. And instead of throwing away the scapes, we have found a delicious culinary alternative.
Even though a scape, in no way, looks like a garlic clove, it smells like garlic and tastes like it as well! Prepare it as you would scallions and use it in any recipe that calls for garlic. Take a look at this great blog post for more inspiration.
How to freeze garlic scapes: I froze garlic scapes last year simply by cutting them into 1" pieces and placing them in a freezer bag. Simple. We enjoyed them through the summer, winter, and spring and they were good as if we used fresh. Since I was happy with last year's results, I repeated the same method this year.
Harvest Details: So my family planted three rows of garlic, each being 500 feet long. We were able to harvest about 2 1/2 five-gallon buckets of scapes.
Freezing Details: I froze 9 quarts of garlic scapes.

It is harvest time here and you know what that means. . . Lots of canning and freezing! The first item up is garlic scapes. For those who are scratching their heads right now, a garlic scape is a shoot from the garlic plant that grows from the base of the plant around the beginning of June. This shoot, which starts out straight and then turns into a lovely tendril, can blossom and will cause the plant to go to seed. That is why it is important to have it removed before it flowers. And instead of throwing away the scapes, we have found a delicious culinary alternative.
Even though a scape, in no way, looks like a garlic clove, it smells like garlic and tastes like it as well! Prepare it as you would scallions and use it in any recipe that calls for garlic. Take a look at this great blog post for more inspiration.
How to freeze garlic scapes: I froze garlic scapes last year simply by cutting them into 1" pieces and placing them in a freezer bag. Simple. We enjoyed them through the summer, winter, and spring and they were good as if we used fresh. Since I was happy with last year's results, I repeated the same method this year.
Harvest Details: So my family planted three rows of garlic, each being 500 feet long. We were able to harvest about 2 1/2 five-gallon buckets of scapes.
Freezing Details: I froze 9 quarts of garlic scapes.

Giant, Humongous, Gigantic, Monstrous, Huge, and YUM-O Pretzels
5/30/10: Baked Ziti with Giant Bavarian Pretzels
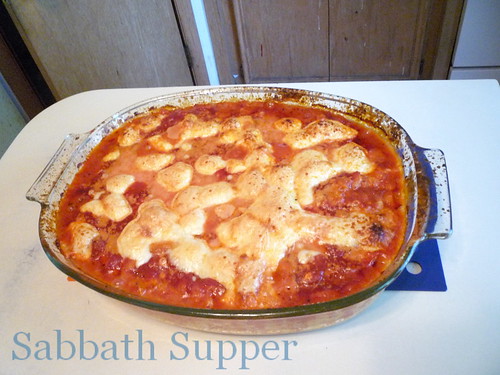
Meal details: For the main course I made a type of Italian American pasta casserole called ziti. Its name is derived from the typical pasta shape that it calls for. As a side, I made homemade soft pretzels.
Defining moments: First time making pretzels! Memories of watching my older brother Matt make pretzels came to mind when I was forming them. They are a fun side to make and they don't take that much time. It is also my first time making ziti.
Recipe sources: The ziti dish* comes from American Test Kitchen, one of my favorite cooking shows. The pretzel recipe came from the October 2009 issue of Everyday with Rachael Ray.
What I learned: After pulling all the ingredients together to make the ziti it seemed to me that my family's old favorite, Macaroni Italiano isn't too far from being called ziti. Macaroni Italiano is an old family favorite and I am still not sure where we got the recipe. I think it was formed on the whim; something like our homemade spaghetti sauce. With casseroles and spaghetti sauces, it doesn't seem like a recipe is needed. I mean the little-bit-of-this-and-a-little-bit-of-that method works out most of the time!
If you ever have watched an episode of America's Test Kitchen (ATK) you would know that each of their recipes has a secret or twist. Such as their grilled corn on the cob. . . Instead of grilling it in husks, they place the husked ears into a brine beforehand. With the baked ziti, they omitted the traditional ricotta cheese for cottage cheese. Why? They said that the Test Kitchen staff thought the ricotta created a grainy texture. They also used two sauces: a tomato based one and an alfredo sauce. And last but not least, they cubed their mozzarella into 1/4" cubes, mixed it into the sauce, and sprinkled them on top as well. This technique leads to mozzarella in every bite.
The pretzels weren't as hard to form as I thought! They do require numerous steps (such as rolling out the dough into a long log, dipping them in a baking soda and water mixture, forming them in their traditional shapes, applying egg wash and salt, etc.), but their fast baking time makes up for this. And once you are done with the first pretzel you sort of get into the rhythm of things.
Any modifications? Yes, I made some modifications to the ziti recipe because of lack of ingredients.
Other than those listed above, I followed the recipe exactly.
How did it taste? The ziti recipe was good but to tell you the truth, I think I like out Macaroni Italiano more. :D Our recipe includes things like bell peppers, ground beef, loads more mozzarella, and onions. . . Ingredients that I love! It was a good dish, nonetheless, and I really did like the creaminess that was achieved by using the cottage cheese. Something to keep in mind when making a lasagna.
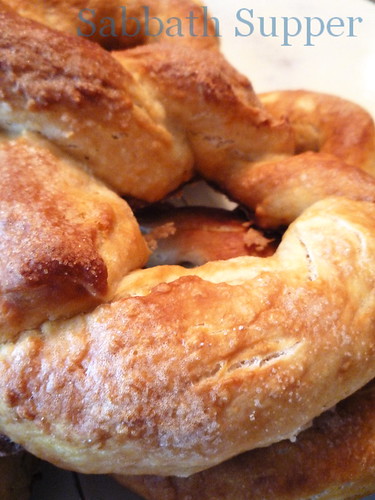
And let us not forget the pretzels! They were WONDERFUL! They were big, soft, and had a crispy exterior. I may have gone too far with the sprinkling of salt (especially since I served these with ziti), so I'll remember to hold back next time.
How about a 2nd time? I don't think I'll pull out this ziti recipe again but I will definitely keep the pretzel bookmarked. I want to try them with mustard!



*You need to register to view the recipe. It is free and available to the public.
Meal details: For the main course I made a type of Italian American pasta casserole called ziti. Its name is derived from the typical pasta shape that it calls for. As a side, I made homemade soft pretzels.
Defining moments: First time making pretzels! Memories of watching my older brother Matt make pretzels came to mind when I was forming them. They are a fun side to make and they don't take that much time. It is also my first time making ziti.
Recipe sources: The ziti dish* comes from American Test Kitchen, one of my favorite cooking shows. The pretzel recipe came from the October 2009 issue of Everyday with Rachael Ray.
What I learned: After pulling all the ingredients together to make the ziti it seemed to me that my family's old favorite, Macaroni Italiano isn't too far from being called ziti. Macaroni Italiano is an old family favorite and I am still not sure where we got the recipe. I think it was formed on the whim; something like our homemade spaghetti sauce. With casseroles and spaghetti sauces, it doesn't seem like a recipe is needed. I mean the little-bit-of-this-and-a-little-bit-of-that method works out most of the time!
If you ever have watched an episode of America's Test Kitchen (ATK) you would know that each of their recipes has a secret or twist. Such as their grilled corn on the cob. . . Instead of grilling it in husks, they place the husked ears into a brine beforehand. With the baked ziti, they omitted the traditional ricotta cheese for cottage cheese. Why? They said that the Test Kitchen staff thought the ricotta created a grainy texture. They also used two sauces: a tomato based one and an alfredo sauce. And last but not least, they cubed their mozzarella into 1/4" cubes, mixed it into the sauce, and sprinkled them on top as well. This technique leads to mozzarella in every bite.
The pretzels weren't as hard to form as I thought! They do require numerous steps (such as rolling out the dough into a long log, dipping them in a baking soda and water mixture, forming them in their traditional shapes, applying egg wash and salt, etc.), but their fast baking time makes up for this. And once you are done with the first pretzel you sort of get into the rhythm of things.
Any modifications? Yes, I made some modifications to the ziti recipe because of lack of ingredients.
- Instead of ziti noodles, I used elbow macaroni
- Granulated garlic instead of fresh
- Dried basil instead of fresh
Other than those listed above, I followed the recipe exactly.
How did it taste? The ziti recipe was good but to tell you the truth, I think I like out Macaroni Italiano more. :D Our recipe includes things like bell peppers, ground beef, loads more mozzarella, and onions. . . Ingredients that I love! It was a good dish, nonetheless, and I really did like the creaminess that was achieved by using the cottage cheese. Something to keep in mind when making a lasagna.
And let us not forget the pretzels! They were WONDERFUL! They were big, soft, and had a crispy exterior. I may have gone too far with the sprinkling of salt (especially since I served these with ziti), so I'll remember to hold back next time.
How about a 2nd time? I don't think I'll pull out this ziti recipe again but I will definitely keep the pretzel bookmarked. I want to try them with mustard!
*You need to register to view the recipe. It is free and available to the public.
Sabbath Supper Update
Even though the lack of blog posts indicate that no Sunday suppers have been made, I have been in the kitchen cooking and baking every weekend! It is June now and you know what that means: the farming season is in full swing and it has been taken up a good portion of my time. Nonetheless, I will try to catch up with my posting ASAP.
I am still trying to reach the end of the Food Network Chef Cooking Challenge I joined in September of last year. I've been waiting for more in-season fruits and veggies before I progress. Sunny Anderson is up next for me and a lot of her recipes require tomatoes. . . Something that isn't too far beyond the horizon. Hooray!
I am still trying to reach the end of the Food Network Chef Cooking Challenge I joined in September of last year. I've been waiting for more in-season fruits and veggies before I progress. Sunny Anderson is up next for me and a lot of her recipes require tomatoes. . . Something that isn't too far beyond the horizon. Hooray!
Chicken Cutlets Make for a 'Smashing' Good Time
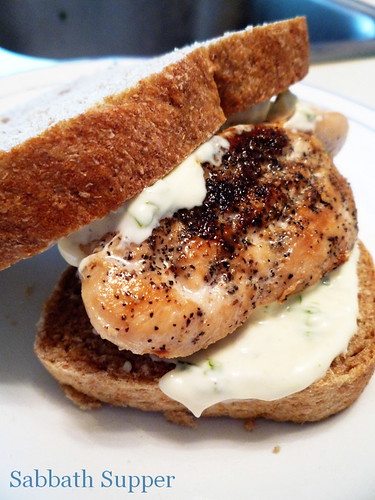
5/23/10: Chicken Cutlets with Herb Mayonnaise served between two slices of Ballymaloe Brown Bread
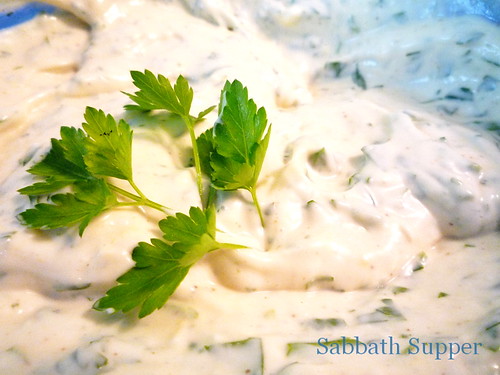
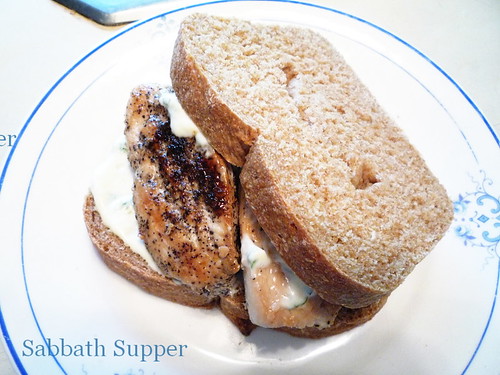
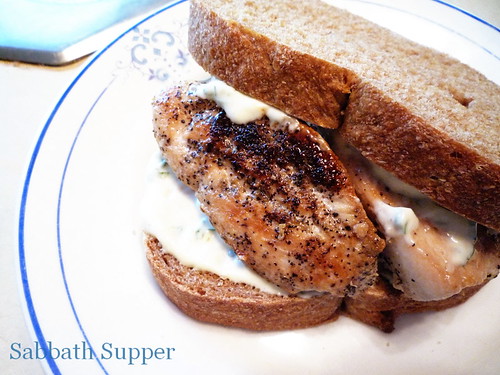
Meal details: I baked two loaves of an Irish brown bread called Ballymaloe and served it with chicken cutlets seasoned with salt and pepper. For a sandwich spread I combined fresh parsley, mayo, and lemon zest and juice.
Defining moments: First time baking bread in a loaf pan! I've baked bread before many a time but I've always done it the artisan way; see what I mean here. This would also be my first time pounding chicken breasts; see how I did it without a mallet by reading on.
Recipe sources: The chicken cutlet and spread recipes are from Sandra Lee. I specifically chose these because I am part of the Food Network Chef Cooking Challenge that is being hosted by the writer of the I Thank My Mother blog. The Ballymaloe Brown Bread recipe came from the Early Spring 2009 issue of The Baking Sheet, a newsletter printed by the people from King Arthur Flour. Here is the recipe written out for you:
Ingredients:
Combine all of the dough ingredients by hand, in a mixer, or in the pan of your bread machine set on the dough cycle. Mix and knead until a soft, smooth dough forms, or let the bread machine finish its cycle.
Cover and let rise for 1 hour. After the dough's first rise, gently deflate it and shape it into a loaf. Place the dough into an 8 1/2 by 4 1/2-inch loaf pan, and then cover with greased plastic wrap or a large inverted bowl. Let the dough rise for 30 to 45 minutes, until it domes 1 inch above the rim of the pan. Bake in a preheated 400 degrees F oven for 35 to 40 minutes, until it reaches 190 degrees F in the center when measured with an instant-read thermometer. Remove from the oven and cool in the pan for 10 minutes, before taking the bread out of the pan to finish cooling on a rack before slicing. Makes 14 to 16 slices.
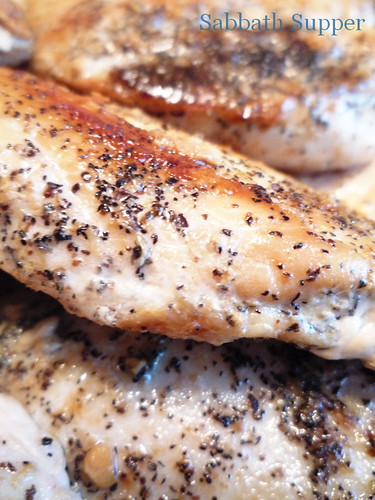
What I learned: Being a person who doesn't like dealing with raw meat, especially when it is soft and slippery, I wasn't looking forward to pounding out my chicken to make cutlets. But I really wanted to try out this technique, and not having a suitable kitchen mallet wasn't going to stand in my way. I took out our Pyrex cutting board, a sheet of plastic wrap, and a rolling pin, and got to work. I cut each breast (which was boneless and skinless) into three or four narrow strips, laid the plastic wrap on top, and gingerly pounded each strip with the rolling pin. The job was really easy to do, the only thing I really didn't enjoy about the ordeal was the hot kitchen! lol! It has been over 80 these past few days, you see!
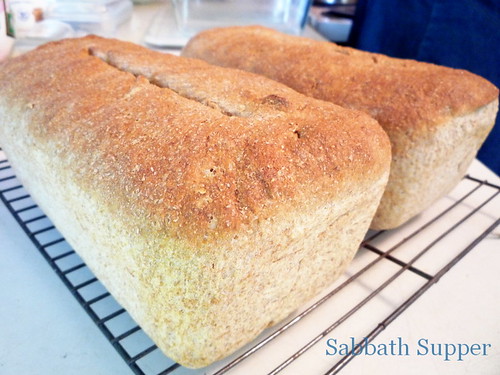
Now let's talk about my favorite part of the day: the bread. I used our Pyrex bread pans and sprayed them lightly with vegetable spray. You can see that my family loves Pyrex, can't you? I followed the recipe by letting the dough double in size, formed it into loaves, placed the loaves in the pans, and covered the pans with an inverted bowl. As soon as I saw that the loaves were 1 inch over the top of the pan, I made a slit on top of each loaf and placed it in the oven. I noticed that as soon as I made the slit, the loaves deflated slightly and when I took them out of the oven, they weren't very tall. I wonder if a) that is how high they should be or b), my slit was the culprit. I've never done bread in the pan before so I'm not sure! And oh by the way, I placed a roasting pan at the bottom of the oven and poured a cup of water in the hot pan when the bread went into the oven. I usually do this "steam" pan when baking bread, it is something I picked up from the book, Artisan Bread in Five Minutes a Day.
Any modifications? I followed the bread recipe exactly but I tweaked the sandwich filling a little bit. Because I didn't have fennel, red onion, or lettuce available, I left those ingredients out.
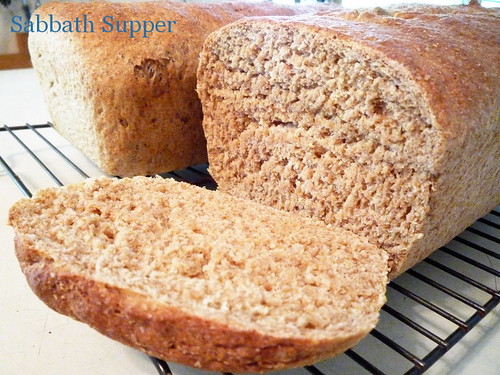
How did it taste? Superb! And a very good supper choice for such a hot day. The chicken was surprisingly moist and flavorful, (gee, a little salt and pepper can go a long way, can't it?), the spread complemented it very well, (that fresh chopped parsley was the star of the spread), and the bread was soft and tasty.
How about a 2nd time? Yes, and I am interested in giving this brown bread another go. Maybe next time I will have a loaf that will mimic the Empire State Building. Who knows? :D

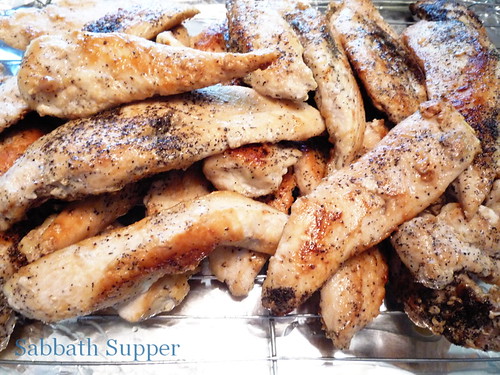
I sometimes think I am an Army Cook. Now you can see why!
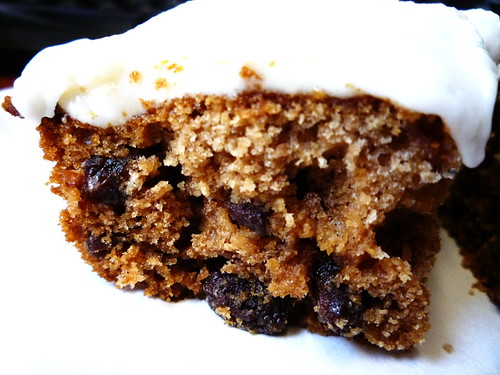
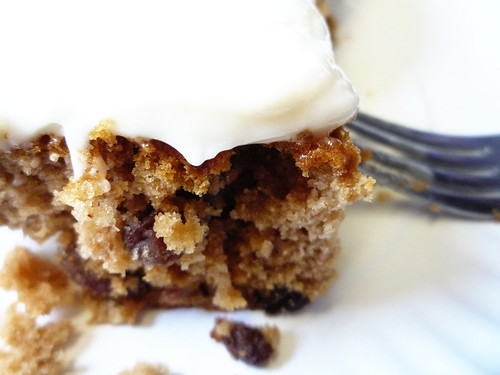
And here are a couple shots of dessert. It is an Applesauce Cake that Annemarie made the day before. She used the applesauce we canned last January and boy oh boy, it was delicious!
Meal details: I baked two loaves of an Irish brown bread called Ballymaloe and served it with chicken cutlets seasoned with salt and pepper. For a sandwich spread I combined fresh parsley, mayo, and lemon zest and juice.
Defining moments: First time baking bread in a loaf pan! I've baked bread before many a time but I've always done it the artisan way; see what I mean here. This would also be my first time pounding chicken breasts; see how I did it without a mallet by reading on.
Recipe sources: The chicken cutlet and spread recipes are from Sandra Lee. I specifically chose these because I am part of the Food Network Chef Cooking Challenge that is being hosted by the writer of the I Thank My Mother blog. The Ballymaloe Brown Bread recipe came from the Early Spring 2009 issue of The Baking Sheet, a newsletter printed by the people from King Arthur Flour. Here is the recipe written out for you:
Ballymaloe Brown Bread
Yield: One loaf using a 8 1/2 by 4 1/2-inch loaf pan
Yield: One loaf using a 8 1/2 by 4 1/2-inch loaf pan
Ingredients:
- 3 1/2 cups (14 ounces) King Arthur whole wheat flour, Traditional or White Whole Wheat
- 2 teaspoons instant yeast
- 2 tablespoons (1 1/2 ounces) molasses
- 1 teaspoon salt
- 1 1/4 cups (10 ounces) water
Combine all of the dough ingredients by hand, in a mixer, or in the pan of your bread machine set on the dough cycle. Mix and knead until a soft, smooth dough forms, or let the bread machine finish its cycle.
Cover and let rise for 1 hour. After the dough's first rise, gently deflate it and shape it into a loaf. Place the dough into an 8 1/2 by 4 1/2-inch loaf pan, and then cover with greased plastic wrap or a large inverted bowl. Let the dough rise for 30 to 45 minutes, until it domes 1 inch above the rim of the pan. Bake in a preheated 400 degrees F oven for 35 to 40 minutes, until it reaches 190 degrees F in the center when measured with an instant-read thermometer. Remove from the oven and cool in the pan for 10 minutes, before taking the bread out of the pan to finish cooling on a rack before slicing. Makes 14 to 16 slices.
What I learned: Being a person who doesn't like dealing with raw meat, especially when it is soft and slippery, I wasn't looking forward to pounding out my chicken to make cutlets. But I really wanted to try out this technique, and not having a suitable kitchen mallet wasn't going to stand in my way. I took out our Pyrex cutting board, a sheet of plastic wrap, and a rolling pin, and got to work. I cut each breast (which was boneless and skinless) into three or four narrow strips, laid the plastic wrap on top, and gingerly pounded each strip with the rolling pin. The job was really easy to do, the only thing I really didn't enjoy about the ordeal was the hot kitchen! lol! It has been over 80 these past few days, you see!
Now let's talk about my favorite part of the day: the bread. I used our Pyrex bread pans and sprayed them lightly with vegetable spray. You can see that my family loves Pyrex, can't you? I followed the recipe by letting the dough double in size, formed it into loaves, placed the loaves in the pans, and covered the pans with an inverted bowl. As soon as I saw that the loaves were 1 inch over the top of the pan, I made a slit on top of each loaf and placed it in the oven. I noticed that as soon as I made the slit, the loaves deflated slightly and when I took them out of the oven, they weren't very tall. I wonder if a) that is how high they should be or b), my slit was the culprit. I've never done bread in the pan before so I'm not sure! And oh by the way, I placed a roasting pan at the bottom of the oven and poured a cup of water in the hot pan when the bread went into the oven. I usually do this "steam" pan when baking bread, it is something I picked up from the book, Artisan Bread in Five Minutes a Day.
Any modifications? I followed the bread recipe exactly but I tweaked the sandwich filling a little bit. Because I didn't have fennel, red onion, or lettuce available, I left those ingredients out.
How did it taste? Superb! And a very good supper choice for such a hot day. The chicken was surprisingly moist and flavorful, (gee, a little salt and pepper can go a long way, can't it?), the spread complemented it very well, (that fresh chopped parsley was the star of the spread), and the bread was soft and tasty.
How about a 2nd time? Yes, and I am interested in giving this brown bread another go. Maybe next time I will have a loaf that will mimic the Empire State Building. Who knows? :D
I sometimes think I am an Army Cook. Now you can see why!
And here are a couple shots of dessert. It is an Applesauce Cake that Annemarie made the day before. She used the applesauce we canned last January and boy oh boy, it was delicious!
"Orange" You Glad It's Pig? -- Pork Chops Meet Orange Marmalade
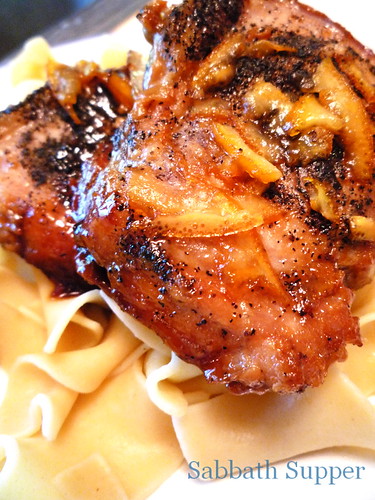
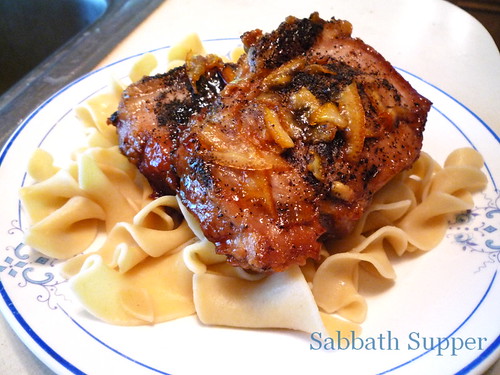
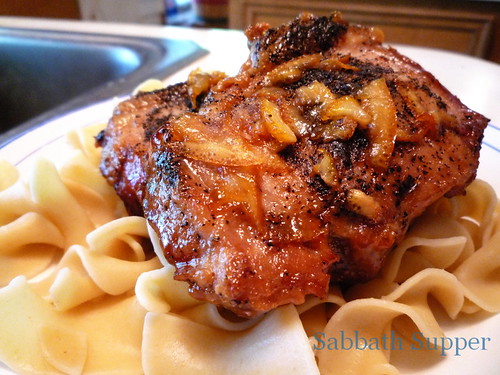
5/16/10: Pork Chops with Orange Soy Glaze and Udon Noodles alongside Hoosier Peanut Bars
Meal details: For the main course I seared 1 inch pork loin chops and braised them in a sauce that had orange marmalade, soy sauce, sesame seed oil, and chicken stock. And for dessert I made a really intriguing bar that has a cookie-like bottom layer, a chocolate middle, and a meringue and peanut topping. Sounds yummy, doesn't it?
Defining moments: First time using soy sauce for me! Yeah, it looks like I don't usually cook Asian.
Recipe sources: The pork chop recipe comes from Robin Miller, the host of Quick Fix Meals with Robin Miller that airs on Food Network. I specifically chose it because I am part of the Food Network Chef Cooking Challenge that is being hosted by the writer of the I Thank My Mother blog.
The Hoosier Peanut Bar recipe came from the August 2009 issue of Baker's Sheet, a newsletter written by King Arthur's Flour. Here is the recipe for those who are interested:
Ingredients for Base:
Ingredients for Topping:
Preheat the oven to 350 degrees F. Grease a 13 x 9-inch pan, and line it with a sheet of parchment paper that goes down one long side and up the other, with some extra on each side. Fold the paper so it doesn't droop down into the pan.
For the base: Whisk together the flour, baking powder, baking soda, and salt; set aside.
Separate the eggs, putting the whites into another clean mixing bowl.
In a large mixing bowl, cream the butter and sugars until light. Add the egg yolks, one at a time, and mix until combined. Scrape the sides and bottom of the mixing bowl; beat in the vanilla.
Add the dry ingredients alternately with the water until the dough is mixed; it will be stiff.
Press the dough into the prepared pan with wet fingers or using a mini pastry roller over a piece of plastic wrap.
For the topping: Spread the chocolate chips over the dough in the pan, pressing them in lightly. Whip the reserved egg whites until they become foamy. Gradually add the brown sugar and beat until the mixture is stiff. Spread over the chocolate chips. Sprinkle the chopped peanuts evenly over the top.
Bake for 30 to 35 minutes, until the top is light golden brown and the edges just pull away from the sides of the pan. Remove from the oven and place on a rack to cool for 15 minutes. Cut into bars or squares while still warm. Once the bars are cool, you can pull them straight up and out of the pan using the parchment paper on the sides. Yield: 24 bars.
What I learned: The pork chop recipe was really easy to execute and I can't think of any new knowledge gained by doing this recipe. I do have some notes for the peanut bar recipe. When I was beating the egg whites to form the topping, I was uncertain on what was considered "stiff" as was said in the recipe. I know that you can easily over beat egg whites so I was biting my nails as I carefully watched my KitchenAid. I decided to stop the machine when the whites and added sugar started to look white and glossy. I then started beating it by hand to carry it to the final stage, which was, I am guessing, when it resembled marshmallow fluff. I soon found out that I was right in my assumption because the finished bars looked just like the recipe's photo.
Any modifications? I followed the bar recipe exactly but I substituted egg noodles for the udon noodles called for in the pork chop recipe.
How did it taste? The family loved both dishes! The pork chops were flavorful, tender, and paired very well with the egg noodles. My Papa said they needed more marmalade, though, so I will remember to use the whole jar next time. The peanut bars were very delicious and I love the surprise meringue topping. They look like they would be hard and crunchy but they turned out to be soft and chewy. . . Two textures I love when it comes to desserts. :)
How about a 2nd time? Absolutely.
Note: It seems to me that I almost always give a positive answer to the last question. Now that's encouraging!
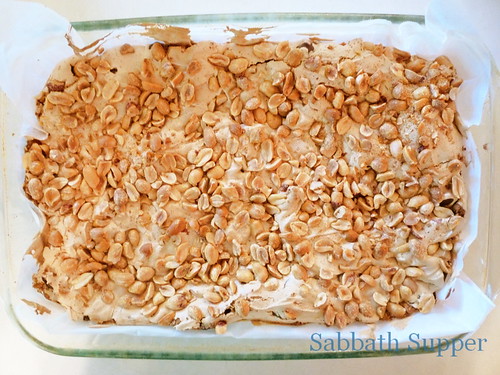
My goodness! Look at all that peanut goodness!
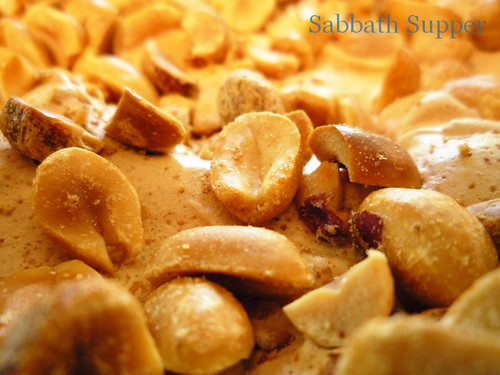
That Dick Van Dyke Show episode comes to mind right about now. :D
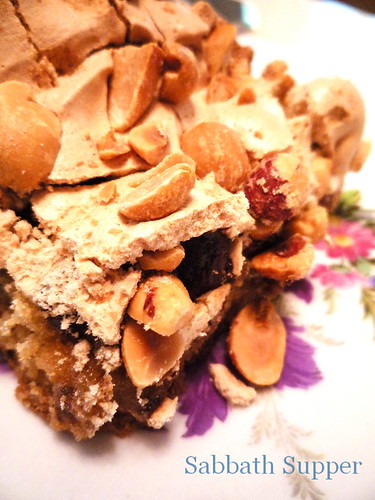
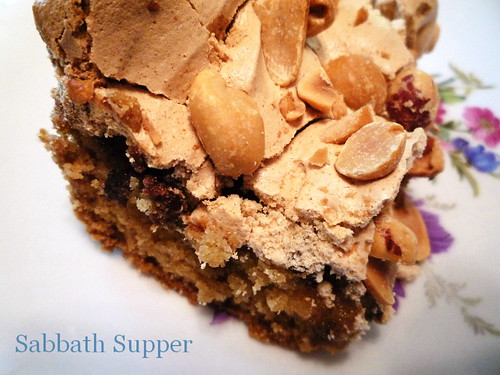
Is it just me, or is my sister's photos getting better each week?
Meal details: For the main course I seared 1 inch pork loin chops and braised them in a sauce that had orange marmalade, soy sauce, sesame seed oil, and chicken stock. And for dessert I made a really intriguing bar that has a cookie-like bottom layer, a chocolate middle, and a meringue and peanut topping. Sounds yummy, doesn't it?
Defining moments: First time using soy sauce for me! Yeah, it looks like I don't usually cook Asian.
Recipe sources: The pork chop recipe comes from Robin Miller, the host of Quick Fix Meals with Robin Miller that airs on Food Network. I specifically chose it because I am part of the Food Network Chef Cooking Challenge that is being hosted by the writer of the I Thank My Mother blog.
The Hoosier Peanut Bar recipe came from the August 2009 issue of Baker's Sheet, a newsletter written by King Arthur's Flour. Here is the recipe for those who are interested:
Hoosier Peanut Bars
Ingredients for Base:
- 2 cups (8 1/2 ounces) King Arthur Unbleached All-Purpose Flour
- 2 teaspoons baking powder
- 1 teaspoon baking soda
- 1/2 teaspoon salt
- 2 large eggs, separated
- 1/2 cup (1 stick, 4 ounces) unsalted butter
- 1/2 cup (3 1/2 ounces) granulated sugar
- 1/2 cup (3 1/4 ounces) firmly packed brown sugar
- 1 teaspoon vanilla extract
- 3 tablespoons (1 1/2 ounces) cold water
Ingredients for Topping:
- 2 cups (12 ounces) bittersweet or semisweet chocolate chips
- 2 large egg whites (from above)
- 1 cup (7 1/2 ounces) firmly packed brown sugar
- 1 cup (5 ounces) chopped lightly salted peanuts
Preheat the oven to 350 degrees F. Grease a 13 x 9-inch pan, and line it with a sheet of parchment paper that goes down one long side and up the other, with some extra on each side. Fold the paper so it doesn't droop down into the pan.
For the base: Whisk together the flour, baking powder, baking soda, and salt; set aside.
Separate the eggs, putting the whites into another clean mixing bowl.
In a large mixing bowl, cream the butter and sugars until light. Add the egg yolks, one at a time, and mix until combined. Scrape the sides and bottom of the mixing bowl; beat in the vanilla.
Add the dry ingredients alternately with the water until the dough is mixed; it will be stiff.
Press the dough into the prepared pan with wet fingers or using a mini pastry roller over a piece of plastic wrap.
For the topping: Spread the chocolate chips over the dough in the pan, pressing them in lightly. Whip the reserved egg whites until they become foamy. Gradually add the brown sugar and beat until the mixture is stiff. Spread over the chocolate chips. Sprinkle the chopped peanuts evenly over the top.
Bake for 30 to 35 minutes, until the top is light golden brown and the edges just pull away from the sides of the pan. Remove from the oven and place on a rack to cool for 15 minutes. Cut into bars or squares while still warm. Once the bars are cool, you can pull them straight up and out of the pan using the parchment paper on the sides. Yield: 24 bars.
What I learned: The pork chop recipe was really easy to execute and I can't think of any new knowledge gained by doing this recipe. I do have some notes for the peanut bar recipe. When I was beating the egg whites to form the topping, I was uncertain on what was considered "stiff" as was said in the recipe. I know that you can easily over beat egg whites so I was biting my nails as I carefully watched my KitchenAid. I decided to stop the machine when the whites and added sugar started to look white and glossy. I then started beating it by hand to carry it to the final stage, which was, I am guessing, when it resembled marshmallow fluff. I soon found out that I was right in my assumption because the finished bars looked just like the recipe's photo.
Any modifications? I followed the bar recipe exactly but I substituted egg noodles for the udon noodles called for in the pork chop recipe.
How did it taste? The family loved both dishes! The pork chops were flavorful, tender, and paired very well with the egg noodles. My Papa said they needed more marmalade, though, so I will remember to use the whole jar next time. The peanut bars were very delicious and I love the surprise meringue topping. They look like they would be hard and crunchy but they turned out to be soft and chewy. . . Two textures I love when it comes to desserts. :)
How about a 2nd time? Absolutely.
Note: It seems to me that I almost always give a positive answer to the last question. Now that's encouraging!
My goodness! Look at all that peanut goodness!
That Dick Van Dyke Show episode comes to mind right about now. :D
Is it just me, or is my sister's photos getting better each week?
Dinner Made Possible -- Robert Irvine this Week
5/9/10: Chicken Fricassee with Tomato Basil Pilaf
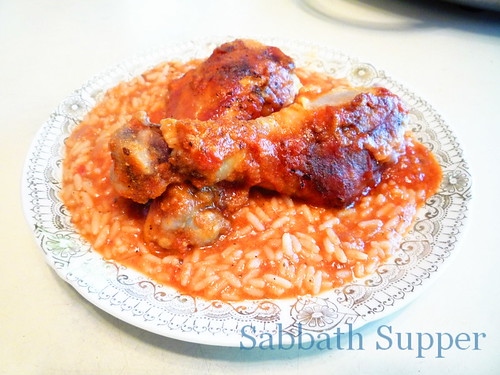
Meal details: The main course consisted of roasted chicken drumsticks that were baked with a tomato, white wine, cream, and seasoned sauce. And the chicken was served on top of rice that was combined with the remaining sauce.
Defining moments: First time I have done fricassee; I have heard about this dish but never knew the traditional ingredients. Fricassee, as it turns out, is a French term used to describe any sort of dish that has poultry stewed in some sort of gravy thickened with butter or cream. In my case, the sauce was tomato based and it was thickened with the latter.
This is my first time creating pilaf, too. Every now and then, I heard this word used on Food Network and never knew what it was, either! Through my research I gather that pilaf is a dish in which a grain (such as rice) is first browned in oil and then cooked in a seasoned broth.
OK, I think that's it for the culinary dictionary. . . Let's move onto where I found these recipes.
Recipe sources: Both the chicken fricassee and pilaf recipes come from Robert Irvine, the host of Dinner Impossible. I specifically chose it because I am part of the Food Network Chef Cooking Challenge that is being hosted by the writer of the I Thank My Mother blog.
What I learned: I learned by doing this recipe that sixteen drumsticks fit perfectly into the large steamer tray--this is very important info people! :D Other than that, I don't think I learned any new techniques or ingredients this week. However, I shouldn't forget that I learned two new terms. . . Fricassee and pilaf.
Any modifications? Yes.
1. Instead of chicken breasts, I used drumsticks. Why? They're cheaper here.
2. I didn't clarify the butter.
3. I used dry basil instead of fresh.
4. I used evaporated milk instead of cream. Why? Didn't have cream on hand.
5. Used granulated garlic instead of fresh. Why? Didn't have any fresh.
2. I didn't clarify the butter.
3. I used dry basil instead of fresh.
4. I used evaporated milk instead of cream. Why? Didn't have cream on hand.
5. Used granulated garlic instead of fresh. Why? Didn't have any fresh.
How it tasted? It turned out perfectly; everybody enjoyed it. The sauce was creamy and really flavored the rice.
How about a 2nd time? Yes.
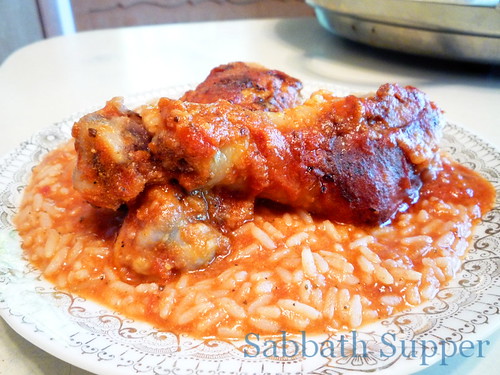
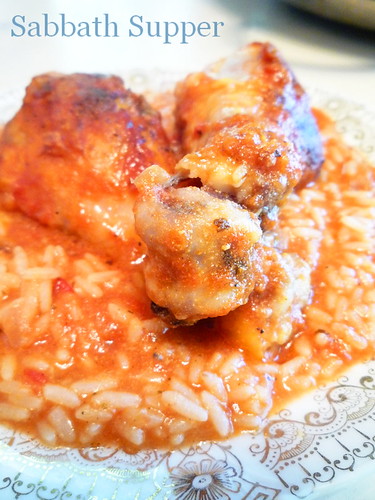
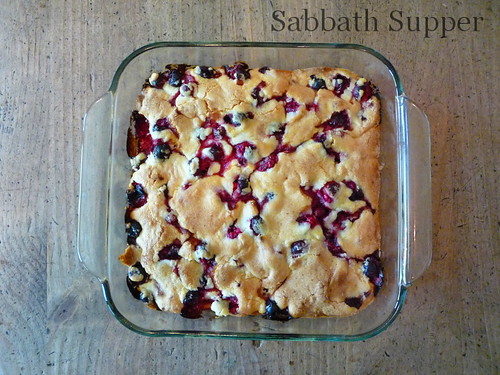
And here are a couple shots of the Cranberry Almond Bars my step mom made the day before. Recipe came from Baker's Sheet, a newsletter King Arthur's Flour sends out.

Everything But the Kitchen Sink -- Creamy Chicken Pot Pie
5/2/10: Creamy Chicken Pot Pie
Meal details: I made a casserole that had traditional pot pie flavors, such as carrots, broccoli, potatoes, and chicken. And the casserole was topped with a biscuit layer, something like a cobbler.
Defining moments: First time using potatoes, carrots, broccoli, peas, and parsnips in one dish. Wow! What a line up of ingredients, huh?
Recipe sources: I was having an incredibly hard time choosing what to make this week. I wanted to select a Robert Irvine recipe (in order to continue with the FNCCC), but nothing jumped out at me and I was running out of time. So Annemarie gave me her recipe binder to browse through. Her binder is not your typical recipe book, it is huge and has the thickness of an encyclopedia set. :D Within five minutes, I found the recipe I wanted. It was a pot pie recipe from Sam's Club and here it is for those who are interested. . .
What you need
1 pkg. (8 oz.) PHILADELPHIA Cream Cheese, cubed
1/2 cup chicken broth
1 lb. cooked Tyson boneless skinless chicken breasts, cubed (about 3 cups)
16 oz. frozen mixed vegetables, thawed
1/2 tsp. garlic salt
1 egg
1/2 cup milk
1 cup all-purpose baking mix
Make it
Heat oven to 400 degrees.
Cook cream cheese and broth in large saucepan on low heat until cream cheese is completely melted and mixture is well blended, stirring frequently with whisk. Stir in chicken, vegetables and garlic salt.
Spoon into 9-inch pie plate. Beat egg and milk in medium bowl with whisk until well blended; stir in baking mix just until moistened. Spoon over chicken mixture. Place pie plate on baking sheet.
Bake 25 to 30 min. or until golden brown.
What I learned: One thing stands out clear to me and it's this: I need to parboil (precook) all vegetables. I parboiled all my vegetables except for the carrots and they didn't cook all the way through when in the oven; they were still firm in areas. I should either precook the carrots or really dice them.
Any modifications? Yes. Instead of using a pie plate, I used our 6 quart casserole dish and a smaller dish for three times the recipe. It is a whole lot easier than trying to maneuver three pie plates in the oven!
And instead of purchasing a bag of frozen vegetables from the store, I used veggies from the previous farming season. They're considered free now, so why not? The parsnips and carrots were kept in a makeshift root cellar (a long box of sand) and I was very happy to see that they were nice and crisp!
How it tasted? When I first chose this recipe I thought, "It looks simple, we have all the ingredients. . . So why not?" Yeah, I wasn't overly enthused about it to tell you the truth! So you can understand why I was amazed by all the good feedback I got from the family. Everyone didn't just like it, they loved it. :D
How about a 2nd time? Definitely!
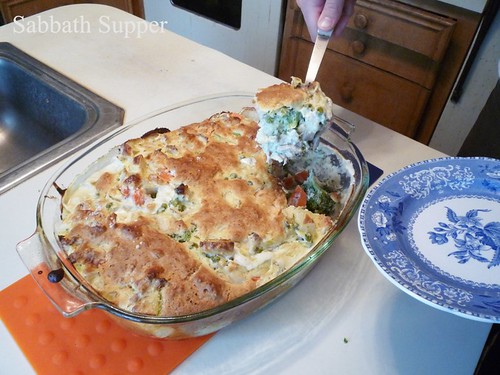
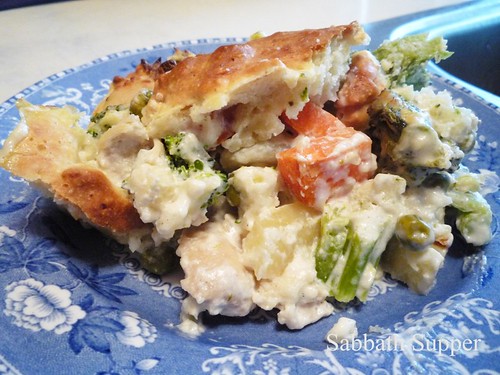
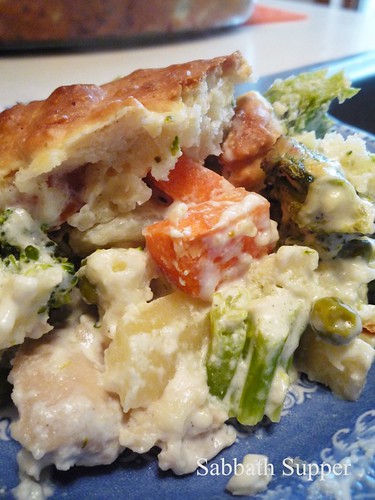
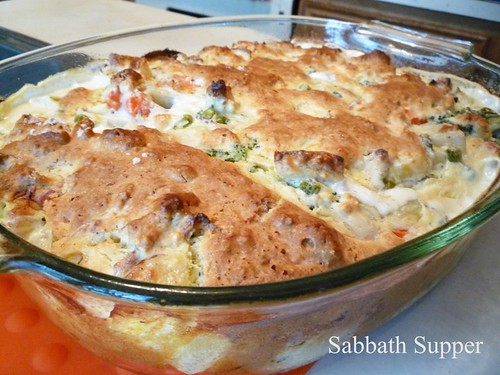
Meal details: I made a casserole that had traditional pot pie flavors, such as carrots, broccoli, potatoes, and chicken. And the casserole was topped with a biscuit layer, something like a cobbler.
Defining moments: First time using potatoes, carrots, broccoli, peas, and parsnips in one dish. Wow! What a line up of ingredients, huh?
Recipe sources: I was having an incredibly hard time choosing what to make this week. I wanted to select a Robert Irvine recipe (in order to continue with the FNCCC), but nothing jumped out at me and I was running out of time. So Annemarie gave me her recipe binder to browse through. Her binder is not your typical recipe book, it is huge and has the thickness of an encyclopedia set. :D Within five minutes, I found the recipe I wanted. It was a pot pie recipe from Sam's Club and here it is for those who are interested. . .
Creamy Chicken Pot Pie
Prep. 10 min. Total 40 min. Makes 8 servings Cost per serving = $0.90
What you need
1 pkg. (8 oz.) PHILADELPHIA Cream Cheese, cubed
1/2 cup chicken broth
1 lb. cooked Tyson boneless skinless chicken breasts, cubed (about 3 cups)
16 oz. frozen mixed vegetables, thawed
1/2 tsp. garlic salt
1 egg
1/2 cup milk
1 cup all-purpose baking mix
Make it
Heat oven to 400 degrees.
Cook cream cheese and broth in large saucepan on low heat until cream cheese is completely melted and mixture is well blended, stirring frequently with whisk. Stir in chicken, vegetables and garlic salt.
Spoon into 9-inch pie plate. Beat egg and milk in medium bowl with whisk until well blended; stir in baking mix just until moistened. Spoon over chicken mixture. Place pie plate on baking sheet.
Bake 25 to 30 min. or until golden brown.
What I learned: One thing stands out clear to me and it's this: I need to parboil (precook) all vegetables. I parboiled all my vegetables except for the carrots and they didn't cook all the way through when in the oven; they were still firm in areas. I should either precook the carrots or really dice them.
Any modifications? Yes. Instead of using a pie plate, I used our 6 quart casserole dish and a smaller dish for three times the recipe. It is a whole lot easier than trying to maneuver three pie plates in the oven!
And instead of purchasing a bag of frozen vegetables from the store, I used veggies from the previous farming season. They're considered free now, so why not? The parsnips and carrots were kept in a makeshift root cellar (a long box of sand) and I was very happy to see that they were nice and crisp!
How it tasted? When I first chose this recipe I thought, "It looks simple, we have all the ingredients. . . So why not?" Yeah, I wasn't overly enthused about it to tell you the truth! So you can understand why I was amazed by all the good feedback I got from the family. Everyone didn't just like it, they loved it. :D
How about a 2nd time? Definitely!
Subscribe to:
Posts (Atom)


