Ciabatta Bread Pizza
1/24/11: Ciabatta Bread Pizza


Meal details: Pizza with a Ciabatta bread crust, homemade pizza sauce, and a pepper, pepperoni, and cheese topping.
Defining moments: First time for us to try out Ciabatta bread, which, by the way, is an Italian bread that is usually used when making panini. The interior of the bread has very large holes so it a great candidate for soaking in flavors like olive oil.
Recipe sources: No recipe was needed for this pizza. Annemarie came up with the concept last Fall and we've been waiting to try it out since. We actually prepared our bell peppers for the freezer in a special way (cut them into ring shapes), just for this pizza.
The pizza sauce was concocted by me, so read on to find it!
What I learned: I created a very tasty recipe for the pizza sauce. I made Sloppy Joe's the Saturday before (I used this recipe here), and I kept a pint of our tomato puree and about a cup of canned tomato paste. On the day of this pizza's creation, I combined these two ingredients with some spices, sugar, and apple cider vinegar. I'll write it out here:
Homemade Pizza Sauce
Yield: Makes about 3 cups
Ingredients:
- 2 cups (16 oz) tomato sauce
- 1 cup (8 oz) tomato paste
- 2 tbsp. apple cider vinegar
- 1 tbsp. Worcestershire sauce
- 2 tbsp. white sugar
- 2 tsp. salt
- 1 tsp. pepper
- 1 tbsp. dried basil
- 1 tbsp. garlic salt
Instructions: Combine all ingredients in a medium sauce pan and cook over moderate heat. Reduce until consistency resembles apple sauce. I recommend tasting at this stage and adjust seasoning if necessary. When it comes to a tomato-based recipe, you usually need to change something in your ingredient lineup.
Now how exactly did I put this pizza together?
I cut the ciabatta bread loaves in half lengthwise and brushed them with a 1/4 cup of olive oil. I then placed them in the oven for about five minutes at 425F; just to crisp up the cut side. I then smeared my pizza sauce over the entire surface of the bread and followed it with lots of shredded mozzarella and monterey jack cheese. On top of the cheese, I fanned out some pepperoni and bell pepper rings evenly. I moved both pizzas to the oven preheated at 425F and I baked them for about 20 minutes, or until the cheese was golden brown and the peppers were sizzling.
Any modifications? Created this recipe.
How it tasted? Very, very, very, very, GOOD! The ciabatta bread made a terrific, crunchy crust and the sauce was zingy and had distinctive tomato flavor.
How about a 2nd time? Oh yes, definitely. And maybe next time I will use homemade ciabatta bread--sounds interesting, huh?


My Old Kentucky Pie
1/07/11: Kentucky Pie
This recipe came from the Holiday Baking 2009 Issue of Cooking with Paula Deen. I, by no means, had the intention of baking this pie when I was browsing the magazine. I was much more interested in the buttermilk pie that was featured on the same page. But it so happened that a) I wanted to bake a pie that day, b) I wanted something chocolate-ly, and c), I wanted something with nuts. So that is how I gravitated towards this pie recipe, which I never heard of before.
Kentucky Pie has a truck load of nuts and chocolate--and then some. I should know about the nuts because me and my sister had to crack all of them by hand. What a job! Pecans are not that easy to crack, there is a required skill for sure. The best way to crack them we found was to crack both the top and the bottom off first, then crack the nut lengthwise. But you need to make sure you crack it BETWEEN the two inner pecan halves. Otherwise, you break the halves into a million and one pieces. :)
As you can see, this pie is not for the faint of heart:

Get a load of all that chocolate! I think I've died and gone to heaven. Here is some more cocoa goodness coming your way:


Did I Forget Something?
12/25/10: Christmas Cake


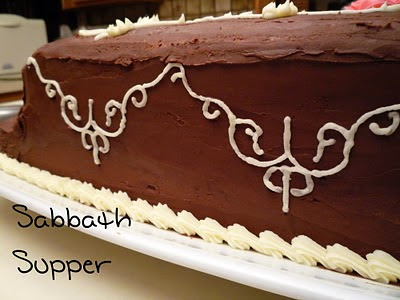


In answer to my post's title: Yes. I completely forgot to post about the cake I baked and decorated for Christmas! How on earth did that happen? Anyhoo, here it is now:


So what recipe(s) did I use?
I used the New Fudge Cake recipe from Annemarie's Betty Crocker cookbook. Here is a scan of the page:

For the cake's filling I used Swiss Meringue Buttercream from this source. The chocolate frosting came from the Sour Cream Cake I did before. And finally, the white frosting I used for piping (as well as the roses) is from here. Whew! Lots of different recipes this time!
What decorating techniques did I use?
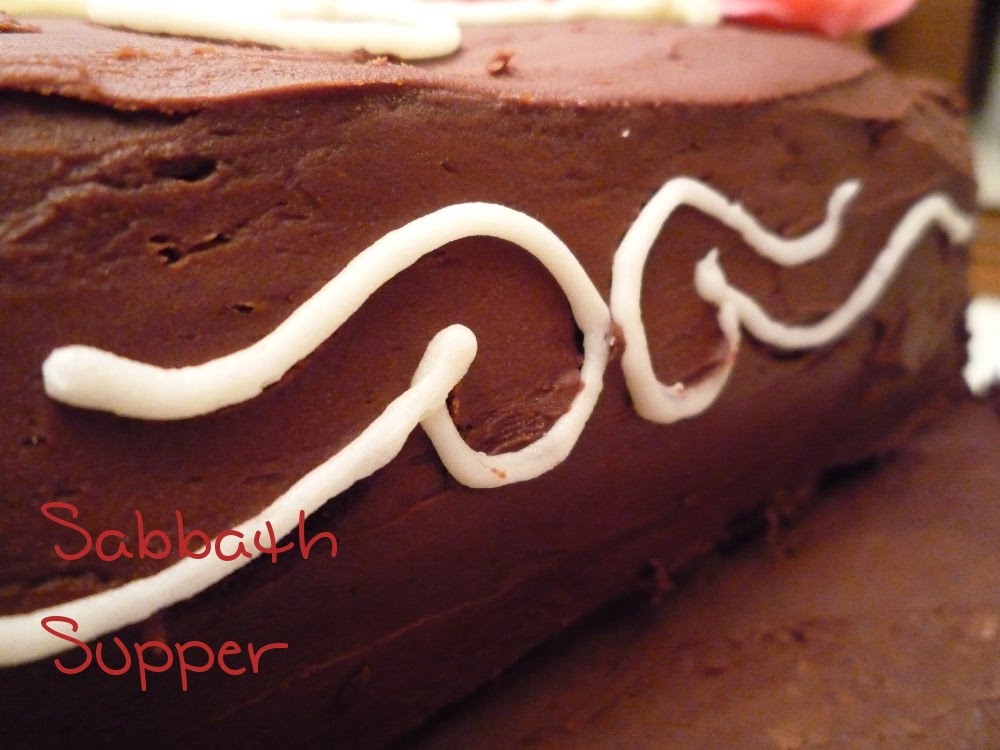
I used two 13 x 9 cakes, stacked them on top of each other, and cut the top layer to make it resemble a tiered cake. After the carving, I piped a shell border at the base of the cake, piped roses using a specific rose tip, and made decorative "facades" around the sides of the cake using a template that I received for my birthday last year. For Christmas I received some liquid dyes (Wilton brand) that can be mixed with frosting, and that is what I used for the colored roses.
How did it taste?
This might actually be my favorite cake as of yet. The actual cake was very moist, chocolate-ly and held up well to being stacked. And the chocolate frosting was just as good as I remembered. But the real attribute of this cake was the Swiss Meringue Buttercream that I used for the filling. Papa said that it reminded him of an expensive torte he had long ago. It was so delicious!
Homemade Hot Dog Buns
12/29/10: Hot Dog Buns Straight from Our Kitchen


My family likes to include hot dogs in our weekly meal schedule because of two reasons: they are inexpensive and they only take a half an hour to cook. I like hot dogs a lot (especially Chicago-style!), so I don't mind this tradition whatsoever!
There is one thing, though, when it comes to this meal choice: the buns. If you don't buy them on sale, they cost way more than the hot dogs themselves. Is there any way to make them here at home?
Annemarie and I've tried making hamburger buns before (see my attempts here and here), but never gave the hot dog bun a try. So I searched the internet looking for some recipes, photos, videos, and inspiration and didn't really find a recipe for a soft bun. I really wanted to find a bun that would remind you of Wonder Bread or something in that field of bread texture.
My sister is the one that found the right site. J. Timothy King's blog to be exact. His post on making hot dog buns with the bread machine sparked my interest and I literally went straight to the kitchen after learning about it!
So I took out my bread machine's recipe book, found the recipe for White Bread, followed the directions for a one pound loaf, and selected "Dough" (#6). I used the dough cycle before when I made cinnamon rolls, read about it here. Find the White Bread recipe I used at the bottom of this post.
I removed the dough from the pan and divided it into six equal portions using my dough cutter. I formed each piece into a ball then rolled it into a log that was 6" in length. I placed the formed buns on a cookie sheet lined with non-stick foil and spaced them 1/2" to 1" apart. I covered them loosely with plastic wrap and placed them in a warm area (on top of a warm oven in my case), to rest for 45 minutes. After they rose I moved them to a 375F preheated oven and baked them for 10 minutes, or until they were lightly golden on top.
This is how they turned out:


I was very impressed when they came out of the oven! And they were perfect with the hot dogs. They were soft but they weren't like the Wonder Bread buns, I think they were better. :) As you can see, I made sure the buns were close to each other when baking. I thought it would result in softer buns if done this way. After examining the buns that were on the end of the lineup (the buns that would have more contact with the oven's radiating heat), I don't think it is necessary.
Buns without a bread machine? On 4-23-11 I tried making these buns without the use of the bread machine. They raised perfectly fine and I couldn't detect any difference in bun size or texture. The real key to doing any dough outside the machine is to find a warm spot in the kitchen. If it is warm and there are no drafts, you're all set.
Now for the White Bread recipe that I used to make these:
Simple and Easy Homemade Hot Dog Buns
Yield: 6 buns
Ingredients:
3/4 cup + 1 tbsp. warm water (about 110F)
1-1/2 tbsp. granulated sugar
1 tbsp. vegetable oil
1 tsp. salt
1 tbsp. dry milk
2-1/4 cups bread flour
1-1/4 tsp. active dry yeast
Directions:
When using a bread machine. . . Add all the ingredients to your bread pan in order they are written. Select Dough Cycle. Once cycle is done, follow instructions for "Forming Buns."
Without bread machine. . . In measuring cup, combine water, sugar, and yeast. Wait until yeast begins to foam; about 5 minutes. In medium mixing bowl, add oil, salt, dry milk, and flour; stir to combine. Make a well in the middle of the flour mixture and pour in yeast mixture. Stir with a wooden spoon until fully incorporated. Turn out onto dusted surface and knead for five minutes; dough should be smooth. Oil a large bowl with non-stick spray. Form dough into a ball and place in oiled bowl. Invert dough so oil is on top. Cover bowl with plastic wrap and place in a warm spot in kitchen that is free of drafts.
Allow dough to rise for 40 minutes. Deflate dough and let it rise for additional 20 minutes. Once dough is finished rising, follow instructions for "Forming Buns."
Forming Buns:
Deflate dough and separate dough into six equal pieces. (I do this by cutting the dough in half and then the halves into thirds.) Take a piece of dough and form it into a log that is about 6" to 8" in length. Lay the logs on a cookie sheet lined with parchment and cover them with plastic wrap that has been sprayed with non-stick spray.
Allow the buns to rise for 45 minutes. Remove plastic wrap and place cookie sheets in a 325F preheated oven and bake for 15 to 20 minutes or until buns are light brown on top.
Tips for you:
- Want buns with more chewiness? Add 1 tablespoon potato flour to each cup of flour for the recipe. It really makes a huge difference!
- Bread flour is not always inexpensive compared to all-purpose. Try using half bread flour and half all-purpose when you are making the dough. I've done this numerous times and haven't seen a real difference in flavor or texture. What I have noticed, however, is that they're easier to form; probably due to less gluten.
Subscribe to:
Posts (Atom)


