Did I Forget Something?


12/25/10: Christmas Cake


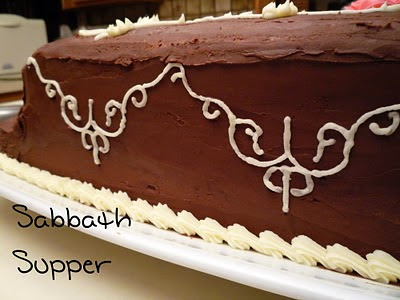


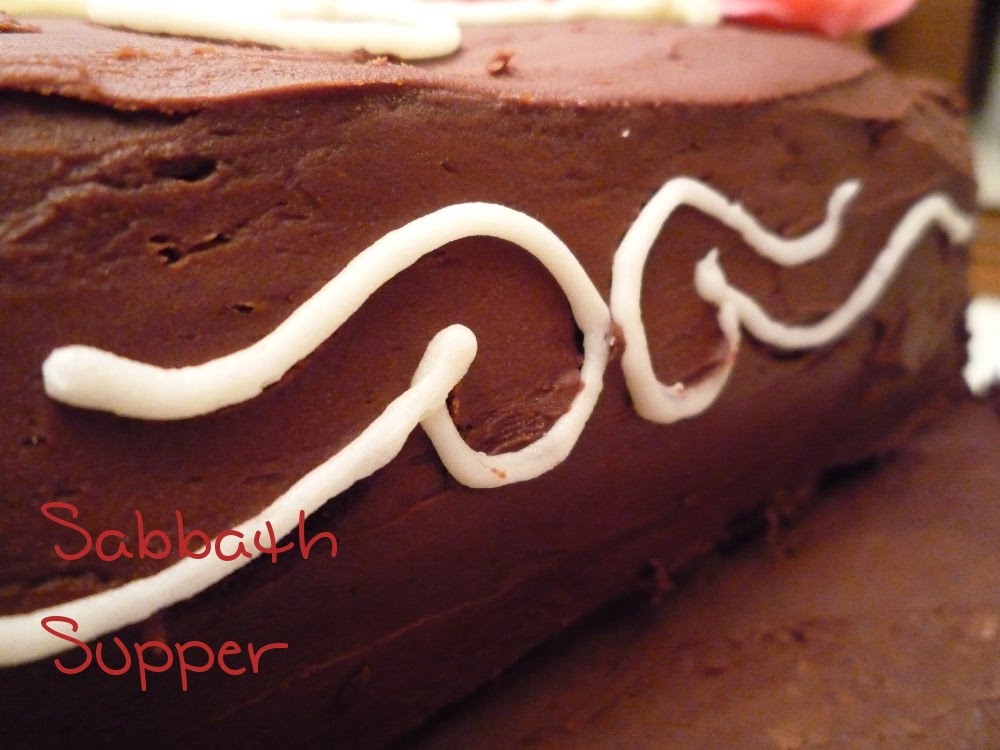
In answer to my post's title: Yes. I completely forgot to post about the cake I baked and decorated for Christmas! How on earth did that happen? Anyhoo, here it is now:


So what recipe(s) did I use?
I used the New Fudge Cake recipe from Annemarie's Betty Crocker cookbook. Here is a scan of the page:

For the cake's filling I used Swiss Meringue Buttercream from this source. The chocolate frosting came from the Sour Cream Cake I did before. And finally, the white frosting I used for piping (as well as the roses) is from here. Whew! Lots of different recipes this time!
What decorating techniques did I use?
I used two 13 x 9 cakes, stacked them on top of each other, and cut the top layer to make it resemble a tiered cake. After the carving, I piped a shell border at the base of the cake, piped roses using a specific rose tip, and made decorative "facades" around the sides of the cake using a template that I received for my birthday last year. For Christmas I received some liquid dyes (Wilton brand) that can be mixed with frosting, and that is what I used for the colored roses.
How did it taste?
This might actually be my favorite cake as of yet. The actual cake was very moist, chocolate-ly and held up well to being stacked. And the chocolate frosting was just as good as I remembered. But the real attribute of this cake was the Swiss Meringue Buttercream that I used for the filling. Papa said that it reminded him of an expensive torte he had long ago. It was so delicious!
Homemade Hot Dog Buns
12/29/10: Hot Dog Buns Straight from Our Kitchen


My family likes to include hot dogs in our weekly meal schedule because of two reasons: they are inexpensive and they only take a half an hour to cook. I like hot dogs a lot (especially Chicago-style!), so I don't mind this tradition whatsoever!
There is one thing, though, when it comes to this meal choice: the buns. If you don't buy them on sale, they cost way more than the hot dogs themselves. Is there any way to make them here at home?
Annemarie and I've tried making hamburger buns before (see my attempts here and here), but never gave the hot dog bun a try. So I searched the internet looking for some recipes, photos, videos, and inspiration and didn't really find a recipe for a soft bun. I really wanted to find a bun that would remind you of Wonder Bread or something in that field of bread texture.
My sister is the one that found the right site. J. Timothy King's blog to be exact. His post on making hot dog buns with the bread machine sparked my interest and I literally went straight to the kitchen after learning about it!
So I took out my bread machine's recipe book, found the recipe for White Bread, followed the directions for a one pound loaf, and selected "Dough" (#6). I used the dough cycle before when I made cinnamon rolls, read about it here. Find the White Bread recipe I used at the bottom of this post.
I removed the dough from the pan and divided it into six equal portions using my dough cutter. I formed each piece into a ball then rolled it into a log that was 6" in length. I placed the formed buns on a cookie sheet lined with non-stick foil and spaced them 1/2" to 1" apart. I covered them loosely with plastic wrap and placed them in a warm area (on top of a warm oven in my case), to rest for 45 minutes. After they rose I moved them to a 375F preheated oven and baked them for 10 minutes, or until they were lightly golden on top.
This is how they turned out:


I was very impressed when they came out of the oven! And they were perfect with the hot dogs. They were soft but they weren't like the Wonder Bread buns, I think they were better. :) As you can see, I made sure the buns were close to each other when baking. I thought it would result in softer buns if done this way. After examining the buns that were on the end of the lineup (the buns that would have more contact with the oven's radiating heat), I don't think it is necessary.
Buns without a bread machine? On 4-23-11 I tried making these buns without the use of the bread machine. They raised perfectly fine and I couldn't detect any difference in bun size or texture. The real key to doing any dough outside the machine is to find a warm spot in the kitchen. If it is warm and there are no drafts, you're all set.
Now for the White Bread recipe that I used to make these:
Simple and Easy Homemade Hot Dog Buns
Yield: 6 buns
Ingredients:
3/4 cup + 1 tbsp. warm water (about 110F)
1-1/2 tbsp. granulated sugar
1 tbsp. vegetable oil
1 tsp. salt
1 tbsp. dry milk
2-1/4 cups bread flour
1-1/4 tsp. active dry yeast
Directions:
When using a bread machine. . . Add all the ingredients to your bread pan in order they are written. Select Dough Cycle. Once cycle is done, follow instructions for "Forming Buns."
Without bread machine. . . In measuring cup, combine water, sugar, and yeast. Wait until yeast begins to foam; about 5 minutes. In medium mixing bowl, add oil, salt, dry milk, and flour; stir to combine. Make a well in the middle of the flour mixture and pour in yeast mixture. Stir with a wooden spoon until fully incorporated. Turn out onto dusted surface and knead for five minutes; dough should be smooth. Oil a large bowl with non-stick spray. Form dough into a ball and place in oiled bowl. Invert dough so oil is on top. Cover bowl with plastic wrap and place in a warm spot in kitchen that is free of drafts.
Allow dough to rise for 40 minutes. Deflate dough and let it rise for additional 20 minutes. Once dough is finished rising, follow instructions for "Forming Buns."
Forming Buns:
Deflate dough and separate dough into six equal pieces. (I do this by cutting the dough in half and then the halves into thirds.) Take a piece of dough and form it into a log that is about 6" to 8" in length. Lay the logs on a cookie sheet lined with parchment and cover them with plastic wrap that has been sprayed with non-stick spray.
Allow the buns to rise for 45 minutes. Remove plastic wrap and place cookie sheets in a 325F preheated oven and bake for 15 to 20 minutes or until buns are light brown on top.
Tips for you:
- Want buns with more chewiness? Add 1 tablespoon potato flour to each cup of flour for the recipe. It really makes a huge difference!
- Bread flour is not always inexpensive compared to all-purpose. Try using half bread flour and half all-purpose when you are making the dough. I've done this numerous times and haven't seen a real difference in flavor or texture. What I have noticed, however, is that they're easier to form; probably due to less gluten.
We Call it "Spaghetti Bread"
12-17-10: Spaghetti Bread


If anyone was to ask me, "What is comfort food for you?" the first dish that comes to mind is our homemade spaghetti sauce. Our spaghetti sauce, in all its goodness, consists of our tomato puree combined with our farm grown peppers, onions, and garlic as well as spices such as basil, marjoram, oregano, etc.
My family has been having our own spaghetti sauce almost every single week of the year for as long as I can remember. Every time I think of this meal I think of two things: my Papa (who pulls all the listed ingredients together and makes the masterpiece), and our farm's bounty. Two very comforting things for me! Now, I could give you the recipe for this sauce, but there really isn't one (it seems to be evolving every single time it's made), and even if I do concoct a written recipe, it wouldn't be like ours. I would need to send you our puree and veggies to make it legitimate!
Now, there is something else that is as old as our spaghetti tradition, but it hasn't had a very good reputation. It is called Spaghetti Bread. Spaghetti bread is a yeast bread done in the bread machine that has dried herbs and grated cheese added. If done right, it is absolutely perfection with a spaghetti dinner. But perfection has been reached few times with this bread. Almost every time we attempted to wrestle this recipe, we would find a deflated loaf at the bottom of our bread machine. Let me tell you, it is enough to bring tears to your eyes.
We came up with a lot of theories on the cause of these mishaps: too much water, too little, acid in the spices, too much salt, etc. etc. etc. So we kept on trying new versions of the recipe, taking out some of this, adding some of that. . . But nothing worked until a couple Fridays ago.
My Papa thought, "Why not use the wheat setting on the bread machine and add the garlic, cheese, and spices at the time the machine alerts you to add addition flavorings, such as raisins and cinnamon?"
Sounded good to me! I gave it a go, following his specific instructions, and it turned out perfectly. It was one of the tallest Spaghetti Breads we ever saw.


See what I mean?
This is what I did from start to finish:
Spaghetti Bread
Yield: 1 pound loaf
Ingredients:
- 9 oz. warm water (about 115 degrees F)
- 4 1/2 tsp. active dry yeast
- 2 1/2 tbsp. sugar
- 3 cups bread flour
- 1/4 cup olive oil
- 1 1/2 tsp. salt
Dough Flavoring Ingredients:
- 1 head garlic
- 1/2 cup grated parmesan cheese
- 1 tsp. basil
- 2 tsp. Italian seasoning
Directions:
To bread pan, add water, yeast, and sugar. Stir and proof for 10-15 minutes. Next add bread flour, oil, and salt. Set machine to "Whole Wheat" setting (#3) and "Medium" (A).
Now to make some garlic puree. (I learned about this technique from The Healthy Bread in Five Minutes a Day cookbook.) Take garlic, with the skin and stem still on, and wrap it in one layer of aluminum foil. Place garlic foil packet into 375 F oven and bake for 45 minutes. Remove from oven, open packet, and allow garlic head to cool. Once cool, cut off the stem and squeeze garlic from skins. The garlic now resembles a paste and can easily be incorporated into the bread dough.
Combine cheese, spices, and garlic in a small bowl.
Machine will beep 1 hr 26 min after you press the START button on the machine, (or when bread time display reads 2:34), that is when you should add the garlic, cheese, and spice mixture to the bread pan.
All in all, it takes 4 hours for the machine to make the bread.
Garlic Puree Technique--Up Close. . .


Bread Machine Setting--Up Close. . .

Now, I suppose you can easily do this without the help of a bread machine, but I haven't given it a try yet. If I ever do I'll come back to this post and document it.
And here is one final glimpse of perfection. . .

;)
A Special Saturday Lunch
12/18/10: Breaded Pork Cutlets with Harvard Beets and Mashed Potatoes
Meal details: Last Saturday I pulled together a nice menu for lunch. It included pork cutlets breaded with simple bread crumbs and egg, beets braised in beet juice, sugar, and vinegar, and home-style mashed potatoes.
Defining moments: I have never made pork cutlets before nor Harvard Beets. Entirely new to me!
Recipe sources: I had no printed recipe for the pork cutlets, I was actually told how to do these by Annemarie. She loves pork cutlets and is really the reason behind me choosing cutlets for Saturday! So I can better remember how to make them later, I will write the recipe down here.
Annemarie's Breaded Pork Cutlets
Ingredients:
- 8 pork cutlets
- 1 1/2 - 2 cups canola oil
- 3 cups plain bread crumbs (I used the Panko variety, but Annemarie typically uses the finer type)
- 6 eggs, beaten with a fork
- 2 teaspoons salt
Directions:
Fill a large, deep skillet with 1/4" to 1/2" of oil and start heating oil on medium-low heat. Place bread crumbs and eggs in separate pie plates. Take a single pork cutlet and dredge it in the crumbs, dip it in the beaten egg, then return it to the crumbs. Make sure the cutlet has a good coating.
Check to see if the oil is at the right temperature by sprinkling some bread crumbs into the oil. If it starts to crackle and pop, the oil is ready. If it spurts up at you, it is probably too hot. Gingerly slide the cutlet into the oil, taking care not to spatter. Allow first side to brown, then flip. When second side is brown, remove cutlets to a cookie sheet lined with paper towels. Total cooking time is between 15 and 20 minutes. Do second batch, if necessary. To keep the pork cutlets warm, cover them with aluminum foil and place in a warm (200 F) oven.
------
The Harvard Beets recipe comes from allrecipes.com. Find it here. Our mashed potato recipe--a staple in my house--is very straightforward. Here is the simple recipe that we use:
Simple Mashed Potatoes
Servings: 8
Ingredients:
3 pounds potatoes (about one cookie sheet worth)
1 stick butter
2 tablespoons salt
Directions:
Wash potatoes and cut them into halves. We leave the skins on, we love the flavor and texture that they add. Place potatoes in a large pot and cover with 1" of water. Heat to boiling and boil until potatoes are fork tender. For us, it usually takes fifteen minutes to reach boiling point and thirty minutes to cook.
Once fork tender, drain potatoes in colander and return to pot. Mash with potato masher or use an electric, handheld blender. Stir in butter and salt.
What I learned: I am very glad to have chosen these three dishes for Saturday because I have never made them before (in the case of the cutlets and beets), or haven't made them much (speaking of the potatoes). The cutlet recipe is truly remarkable, I think, because there are no fancy ingredients evident at all. All simple, pantry staples: bread crumbs, eggs, and salt. And it isn't that hard to execute, either. May be a bit difficult the first time when coating the cutlets, but you quickly get the hang of things. And, as you will find out later in this post, the results are perhaps the true remarkable facet of this recipe!
I like the beet recipe a lot, too. Very accessible ingredients: beets, beet juice, vinegar, sugar, and cornstarch.


Since we still had some beets from our past farming season, I used them for this recipe. I boiled them until they were fork tender and I kept some of the boiling liquid (beet juice) to use for the sauce. By adding cornstarch to the beet juice, I was able to make it thick and smooth.

Any modifications? No.
How did it taste? Everyone loved the pork cutlets, they were tender, crispy, and flavorful. The mashed potatoes--a tried and true side dish--was superb once again. The beets were OK. They weren't as tender as I wanted them to be; they still had a bite to them. Now, I'm not totally sure what this was caused by. Perhaps I didn't boil them long enough? Or maybe they are past their "expiration" date? I'm not sure.
How about a 2nd time? Yes.


The Sweet Side of Sour Cream
12/17/10: Sour Cream Chocolate Cake with Fudge Frosting


Recipe details: Cake recipe is pretty typical, but the addition of sour cream and the fact that you do not need to alternate between dry and wet ingredients (like this one), makes it more special and easier to prepare.
Defining moments: This recipe calls for cocoa powder and I went and used the King Arthur Flour's Double Dutch Dark Cocoa Powder for the first time. My parents gave me a gift card to use on kingarthurflour.com so that's how I got my hands on such a delicious sounding ingredient.
Recipe sources: The recipe comes from Hershey's. Find it here.
What I learned: I've made cake before so I didn't learn any new techniques this time. However, I did find that this cake, along with the fudge frosting, is very easy to do. The frosting isn't your normal buttercream, it is richer and not cloyingly sweet. It almost aways seems like the cooked frostings are so much better. Is it just me?
I should note here that I made two types of frostings. One had grocery store cocoa (I think it is from Gordon's?), and the other had King Arthur Flour's dark cocoa.
Any modifications? No, I made no changes.
How did it taste? I thought it was perfect for a lighter cake and I believe everyone agrees with me. I say, "...for a lighter cake," because I LOVE dense cakes. :) Both kinds of frostings were so yummy. But which one was the favorite? Most everyone thought the dark cocoa type was lacking flavor (or maybe not enough contrast to the dark cocoa cake?), so the grocery store variety won this round.
How about a 2nd time? Yes, definitely.

It is self-explanatory but the pan to the left is grocery store cocoa frosting, and the one to the right has the King Arthur Flour's dark cocoa.

I love shots like the one above.


The Ooey-gooey Post I Promised
12/04/10: Cinnamon Rolls for Saturday
I was hoping to post about these last week but so many things came up!
I think I will be keeping with my original writing style--with all the categories and questions I give myself--so I can remember the most important aspects. OK, let's get to it. . .
--------------
Recipe details: These cinnamon rolls have a cinnamon, sugar, and butter filling--something you would expect, right? But these rolls have a little secret when it comes to preparation. You can make the dough in the bread machine!
Defining moments: This would be, if I remember correctly, the first time I made cinnamon rolls. It would also be the first time I allowed our bread machine to have a hand in the dough forming.
Recipe sources: I used two sources to make these rolls. The dough recipe (called Sweet Dinner Rolls), comes from allrecipes.com and the cinnamon roll filling comes from Annemarie's Betty Crocker cookbook.
What I learned: If you read the King's Arthur Flour blog often you will find that the bakers there sometimes use bread machines. Not only in baking bread from start to finish, but also to knead a wide variety of dough and to allow it to rise. PJ Hamel, one of the blog writers, said the following in her Beautiful Buns post:
For purposes of these photos, I always knead in a stand mixer; but if I’m not photographing, I knead in a bread machine. It’s easier (I can walk away and forget about it), and does a super job.
I second the motion! The bread machine does a wonderful job kneading. I can go and do something else with a free mind--which is a godsend when you are juggling lots of things at once. The only problem I have with it is that I can only do one recipe at a time. I usually have to make two recipes for my family so the overall preparation time is longer. But it less hands-on work, I should remember, and it creates the perfect rising environment.
To make this dough, I added all the ingredients to the bread pan (in the order of the allrecipes.com recipe--it matched my bread machine cookbook), placed the pan into the machine, selected the "Dough" cycle (#6 on my Corner Bakery machine), and pressed START. It took 1 hour until it was ready to shape.

I removed the dough from the pan and started rolling it out into a rectangle that measured 9" x 18". It is a very springy dough so I had a tough time rolling it out to those measurements. Perseverance!


I then smeared the dough with a 1/4 cup butter, sprinkled it with 1/4 cup sugar, and 2 teaspoons of cinnamon.
While the cinnamon aroma filled the kitchen (cinnamon is SO wonderful!), I rolled up the dough jellyroll like and pinched the opening closed.

Then I took my dough cutter (you can use a butter knife), and cut 1" wide pieces from the log. I usually got 12-14 rolls from one log.


I placed the rolls down into a 13x9 Pyrex dish, leaving a little space between each one. I covered the dish with plastic wrap and moved it to a warm area (on top of my stove in my case), for the 2nd rising. It took about 1 hour for them to double in size. My first batch took a long time to show some rising action; probably was caused by a too cold of kitchen.


The photo above shows you how much they rise after the 2nd rising. The one to the right is before they rose.
After they doubled in size, I moved them to a preheated, 400 F oven and baked them for 25 minutes. And here they are, fresh out of the oven:


Many More Suppers to Come

If you have been reading my other blog (St. Gemma's Art and Needlework), you would know that I've been waiting until I bought a computer of my own before I start blogging again. Blogging takes time and you don't always find that when you are borrowing family members' computers! Everyone has been SO generous with it, though! :)
So why am I finally back here at Sabbath Supper? Well, could it be that I bought a computer? Um, yes, that would be right. YAY! I unbelievably bought a laptop! How strange is that?
So now that I have more blogging time I will be posting here regularly, but not in my usual manner. Previously, I've posted about what I did for supper every Sunday. But because I've been given the responsibility of cooking most of the weekly meals--that means both lunch and supper and every day of the week--I will write about particular recipes that deserve a blog mention.
I definitely learned A LOT by doing my Sabbath suppers these past 2 (almost) years, and I hope to learn more cooking skills and recipes in the following months to come. And I mustn't forget that I will be learning another invaluable skill: grocery shopping. I need to keep track of the sales, coupons, and grocery list now. . . Something I've never done before. Yikes! Intimidating, yes, but I'm sure I can get into the swing of things. :)
P.S. Stick around this weekend because I just made something ooey-gooey today that I will be posting about. I've never made them before today so I have lots of notes to jot down.
Sabbath Supper News
Sabbath Supper News
I learn something new almost every Sunday when I make supper for my family, but in the next few weeks I will be looking at food from a different perspective. It is July now and that means harvest time. I will spending July, August, and part of September picking fruits and veggies instead of using them in the kitchen. So Sabbath Supper blogging will be placed on hold for a little bit. I may pop in every now and then when there is a particular veggie I can't pass up, a recipe I want to share, or if I get a weekday free (I do hope that happens!). So farewell for a little while! :D
Psst! I will not leave the "blogosphere" altogether, I will be posting about my sewing, knitting, and crafting endeavors on my other blog, St. Gemma's Art and Needlework.
Thanks!

Basil Bliss -- Tomato and Basil Pizza from Scratch
7/4/10: Tomato and Basil Pizza
Meal details: The sole dish comprised of a tomato, mozzarella and basil pizza. I used pizza dough made from scratch, our homemade tomato sauce, and fresh basil from my herb garden. Talk about homemade!
Defining moments: I've made pizza before many a time (both from scratch, the mix, and frozen), so nothing new for me this week.
Recipe sources: The pizza dough recipe came from the basic recipe section of the 2500 Recipes from Everyday to Extraordinary cookbook. The toppings idea, however, comes from yours truly.
What I learned: There is one thing that stands out for me with this pizza, and that is the sauce I used. I used my family's homemade tomato sauce (which we use as spaghetti sauce so it has all kinds of flavors. . . Peppers, onions, garlic, and different seasonings), and this is something I haven't used as a pizza sauce. I thought it might be kind of liquid-y but after 30 minutes of reducing, it was perfectly thick. And about the addition of the basil. I knew from my Le Hog Pizza experience that sensitive ingredients like thin cut meat or basil will burn if added at the beginning. That is why I sprinkled chopped basil before I added the cheese and added the final basil leaves during the last ten minutes of cooking.
A little side note here. I used one quart of tomato sauce for two 14" pizzas.
Any modifications? I followed the dough recipe exactly.
How did it taste? It was fantastic! The dough was crispy and chewy at the same time. But you know, with all that flavor packed sauce, the gooey mozzarella, and fresh basil, I can't see why it wouldn't!
How about a 2nd time? Absolutely.


Meal details: The sole dish comprised of a tomato, mozzarella and basil pizza. I used pizza dough made from scratch, our homemade tomato sauce, and fresh basil from my herb garden. Talk about homemade!
Defining moments: I've made pizza before many a time (both from scratch, the mix, and frozen), so nothing new for me this week.
Recipe sources: The pizza dough recipe came from the basic recipe section of the 2500 Recipes from Everyday to Extraordinary cookbook. The toppings idea, however, comes from yours truly.
What I learned: There is one thing that stands out for me with this pizza, and that is the sauce I used. I used my family's homemade tomato sauce (which we use as spaghetti sauce so it has all kinds of flavors. . . Peppers, onions, garlic, and different seasonings), and this is something I haven't used as a pizza sauce. I thought it might be kind of liquid-y but after 30 minutes of reducing, it was perfectly thick. And about the addition of the basil. I knew from my Le Hog Pizza experience that sensitive ingredients like thin cut meat or basil will burn if added at the beginning. That is why I sprinkled chopped basil before I added the cheese and added the final basil leaves during the last ten minutes of cooking.
A little side note here. I used one quart of tomato sauce for two 14" pizzas.
Any modifications? I followed the dough recipe exactly.
How did it taste? It was fantastic! The dough was crispy and chewy at the same time. But you know, with all that flavor packed sauce, the gooey mozzarella, and fresh basil, I can't see why it wouldn't!
How about a 2nd time? Absolutely.


To 'Sir'loin with Love
6/24/10: Michael's Grilled Steak Sandwiches with Baked Potatoes
Meal details: The meal this time was steak sandwiches and baked new red potatoes. The steak was first marinated, then broiled, and finally sliced thin. . . Well, as thin as I could do! It was then served on sub rolls and topped with horseradish sauce.
Defining moments: This will be my first experience with cooking steak and first time using a marinating technique. YIKES!
Recipe sources: This is a recipe I found on foodtv.com. It comes from a guest that was on the show, Paula's Best Dishes. His name is Michael Groover.
What I learned: Because I obviously had to decide on a cut of steak I learned a lot about the different cuts that are available. I learned what a tenderloin is, a porterhouse, flank, and the cut we chose: top sirloin. The original recipe called for flank steak, which happens to come from the belly of the cow and is one of the least tender choices of steak there is. Since top sirloin was on sale that week we substituted it for the flank steak. Sirloin, by the way, is cut from the hip section and is divided into top and bottom sirloin. The top is tenderer than the bottom cut.
I also learned how to broil steaks. The recipe said to grill the steak but because a), I didn't want to break out the grill and b), it was raining, I decided to use the oven version of grilling.
One last note here. . . I marinated the steak for three hours before broiling time.
Any modifications? Yes, I used top sirloin steak instead of flank and used granulated garlic instead of fresh.
How did it taste? Let me tell you, I was real nervous about this steak deal! I was biting my nails over the thought of the steak being tough as nails and dry as Death Valley, but my fears subsided quickly as I started cutting the steak. It was easy to slice into and it looked moist. It turned out to be very tender and flavorful and I was one happy camper.
How about a 2nd time? Yes. I may not be a huge steak fan but I love steak sandwiches.
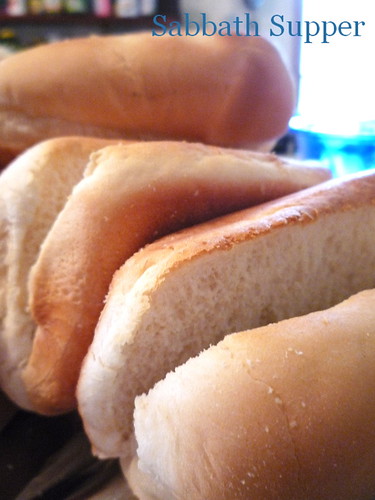
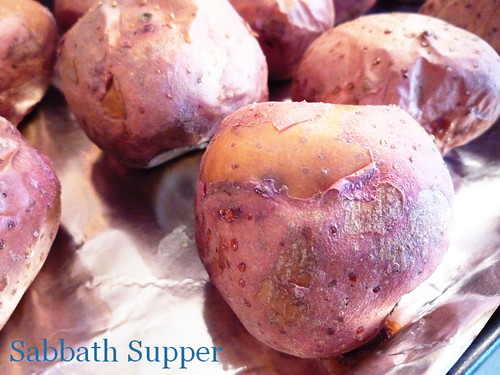
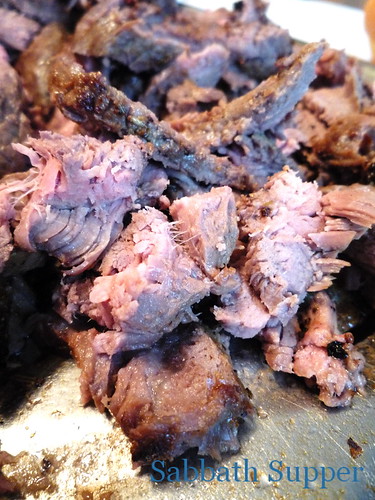
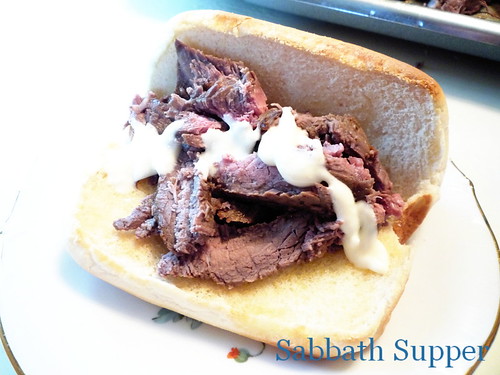
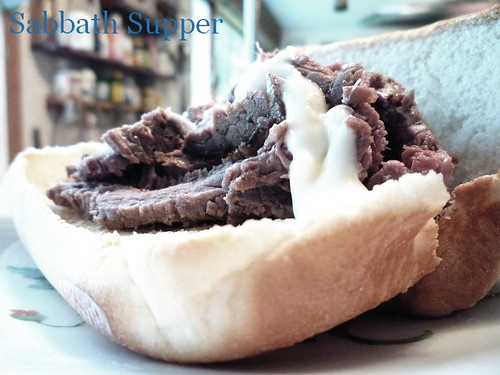
Meal details: The meal this time was steak sandwiches and baked new red potatoes. The steak was first marinated, then broiled, and finally sliced thin. . . Well, as thin as I could do! It was then served on sub rolls and topped with horseradish sauce.
Defining moments: This will be my first experience with cooking steak and first time using a marinating technique. YIKES!
Recipe sources: This is a recipe I found on foodtv.com. It comes from a guest that was on the show, Paula's Best Dishes. His name is Michael Groover.
What I learned: Because I obviously had to decide on a cut of steak I learned a lot about the different cuts that are available. I learned what a tenderloin is, a porterhouse, flank, and the cut we chose: top sirloin. The original recipe called for flank steak, which happens to come from the belly of the cow and is one of the least tender choices of steak there is. Since top sirloin was on sale that week we substituted it for the flank steak. Sirloin, by the way, is cut from the hip section and is divided into top and bottom sirloin. The top is tenderer than the bottom cut.
I also learned how to broil steaks. The recipe said to grill the steak but because a), I didn't want to break out the grill and b), it was raining, I decided to use the oven version of grilling.
One last note here. . . I marinated the steak for three hours before broiling time.
Any modifications? Yes, I used top sirloin steak instead of flank and used granulated garlic instead of fresh.
How did it taste? Let me tell you, I was real nervous about this steak deal! I was biting my nails over the thought of the steak being tough as nails and dry as Death Valley, but my fears subsided quickly as I started cutting the steak. It was easy to slice into and it looked moist. It turned out to be very tender and flavorful and I was one happy camper.
How about a 2nd time? Yes. I may not be a huge steak fan but I love steak sandwiches.
Subscribe to:
Posts (Atom)


