Sloppy Joe's : The Super Hero of the Culinary World


3/21/10: Super Sloppy Joes with Homemade Hamburger Rolls and Life By Chocolate Cupcakes
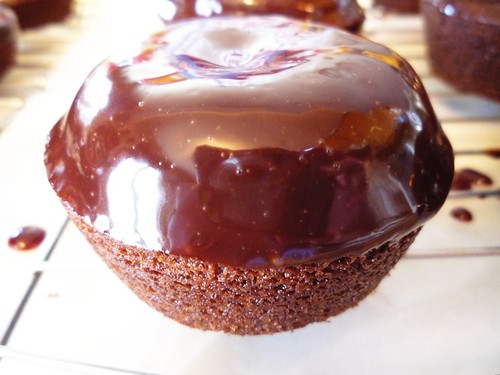
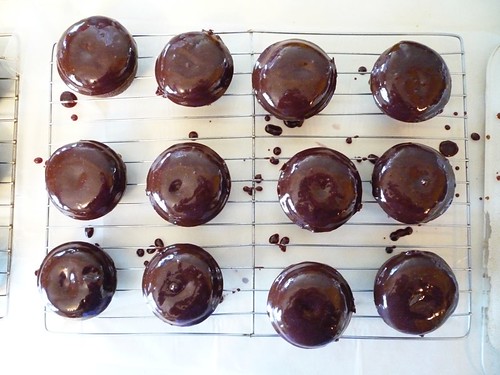
Meal details: Annemarie made some crusty hamburger rolls on Saturday for my Super Sloppy Joe's. The Sloppy Joe recipe includes onions, tomato sauce and paste, bell peppers, Worcestershire sauce, red wine vinegar, and of course, ground beef. For dessert, I made chocolate cupcakes, each with a Hershey Kiss in the middle. :)
Defining moments: First time using a Ree Drummond (Pioneer Woman) recipe and making ganache!
Recipe sources: The Sloppy Joe recipe is from Rachael Ray and I actually made this before. See my original posts here and here. The chocolate cupcake recipe is from the Pioneer Woman's Tasty Kitchen. I just noticed that the Sloppy Joe recipe link on the Food Network website is obsolete. Ugh. How can they delete this recipe from their archive? Oh well, I'll write it out here for you all:
Rachael Ray's Super Sloppy Joe's --
Ingredients
What I learned: Well, because I have done the first recipe before, nothing new there. But the cupcake recipe included a chocolate ganache that you dip the baked and cooled cupcakes in. I've seen it done on t.v. many a time but this is my first on hands approach. It was a lot of fun to make! Especially when pouring the hot cream over the chocolate--boy, did that look delicious!
Any modifications? Yes, I tweaked both recipes slightly. For the sloppy joe's, I didn't use the steak seasoning (don't have any), instead I used pepper. I used ground chuck instead of ground sirloin (cheaper, lol!).
And for Ree Drummond's recipe. . . I didn't add the baking soda to the wet ingredients at the beginning, like the recipe states. I instead, placed the soda in the dry ingredients. I did this because I knew the baking soda would react with the wet ingredients and I didn't want to lose all that leavening power before they are in the oven.
How it tasted? The Sloppy Joe's were as good as ever (especially with those homemade buns), and the cupcakes were VERY good. But then how, I ask you, can a cupcake that has a chocolate batter, a chocolate kiss in the center, and a chocolate ganache on top be bad? Yeah, that doesn't make sense. :D I loved everything about both recipes!
How about a 2nd time? Without a doubt, absolutely, totally, definitely. . . In other words: YES.
Oh yes, a note about the photos. I will begin sharing my photos to you by way of Flickr. So when you click on any one of them, you will be transferred to my Flickr account and have the ability to view them at full scale.
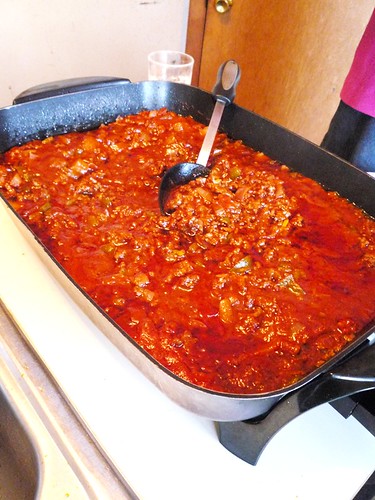
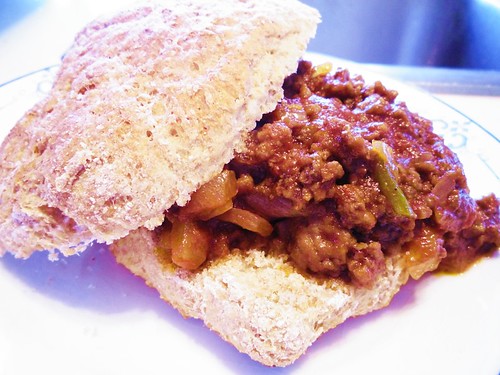
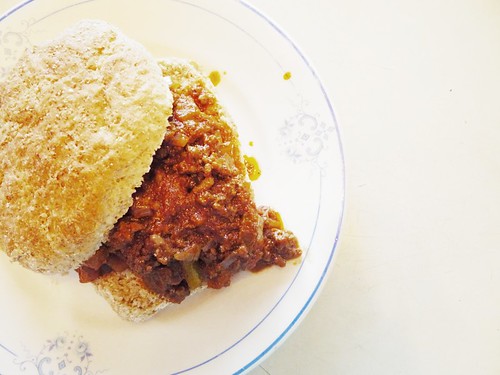

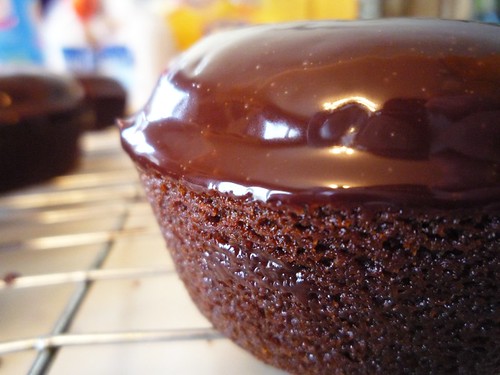
Meal details: Annemarie made some crusty hamburger rolls on Saturday for my Super Sloppy Joe's. The Sloppy Joe recipe includes onions, tomato sauce and paste, bell peppers, Worcestershire sauce, red wine vinegar, and of course, ground beef. For dessert, I made chocolate cupcakes, each with a Hershey Kiss in the middle. :)
Defining moments: First time using a Ree Drummond (Pioneer Woman) recipe and making ganache!
Recipe sources: The Sloppy Joe recipe is from Rachael Ray and I actually made this before. See my original posts here and here. The chocolate cupcake recipe is from the Pioneer Woman's Tasty Kitchen. I just noticed that the Sloppy Joe recipe link on the Food Network website is obsolete. Ugh. How can they delete this recipe from their archive? Oh well, I'll write it out here for you all:
Rachael Ray's Super Sloppy Joe's --
Ingredients
- 1 tablespoon extra-virgin olive oil, 1 turn of the pan
- 1 1/4 lbs ground sirloin
- 1/4 cup brown sugar
- 2-3 teaspoons steak seasoning, such as McCormick brand Montreal seasoning
- 1 medium onion, chopped
- 1 small red bell pepper, chopped
- 1 tablespoon red wine vinegar
- 1 tablespoon Worcestershire sauce
- 2 cups tomato sauce
- 2 tablespoons tomato paste
- 4 crusty rolls, split, toasted, and lightly buttered
Garnish
- sliced ripe tomato
- pickle
- Heat a large skillet over medium high heat.
- Add oil and meat to the pan.
- Spread the meat around the pan and begin to break it up.
- Combine brown sugar and steak seasoning.
- Add sugar and spice mixture to the skillet and combine.
- When the meat has browned, add onion and red peppers to the skillet.
- Reduce heat to medium and cook onions, peppers, red wine vinegar and Worcestershire sauce with meat for 5 minutes.
- Add tomato sauce and paste to pan.
- Stir to combine.
- Reduce heat to simmer and cook Sloppy Joe mixture 5 minutes longer.
- Using a large spoon or ice cream scoop, pile sloppy meat onto toasted, buttered bun bottoms and cover with bun tops.
- Serve with your favorite sides or sliced tomatoes seasoned with salt and pepper, dill pickles and Potato Salad.
- We like to put a thick slice of cheddar on top of the meat in the sandwich and broil it for a few minutes to melt. YUM.
What I learned: Well, because I have done the first recipe before, nothing new there. But the cupcake recipe included a chocolate ganache that you dip the baked and cooled cupcakes in. I've seen it done on t.v. many a time but this is my first on hands approach. It was a lot of fun to make! Especially when pouring the hot cream over the chocolate--boy, did that look delicious!
Any modifications? Yes, I tweaked both recipes slightly. For the sloppy joe's, I didn't use the steak seasoning (don't have any), instead I used pepper. I used ground chuck instead of ground sirloin (cheaper, lol!).
And for Ree Drummond's recipe. . . I didn't add the baking soda to the wet ingredients at the beginning, like the recipe states. I instead, placed the soda in the dry ingredients. I did this because I knew the baking soda would react with the wet ingredients and I didn't want to lose all that leavening power before they are in the oven.
How it tasted? The Sloppy Joe's were as good as ever (especially with those homemade buns), and the cupcakes were VERY good. But then how, I ask you, can a cupcake that has a chocolate batter, a chocolate kiss in the center, and a chocolate ganache on top be bad? Yeah, that doesn't make sense. :D I loved everything about both recipes!
How about a 2nd time? Without a doubt, absolutely, totally, definitely. . . In other words: YES.
Oh yes, a note about the photos. I will begin sharing my photos to you by way of Flickr. So when you click on any one of them, you will be transferred to my Flickr account and have the ability to view them at full scale.
The Sweet and the Sour : Lemon Pork with Honey Applesauce
3/14/10: Lemon Salt Marinated Pork Tenderloin with Honey Roasted Applesauce
Meal details: The sole dish for this meal consisted of a pork loin, crusted with lemon zest, salt, and pepper, seared and roasted in the oven, and served with a sauce of apples, honey, and lemon juice.
Defining moments: First time for me to sear and roast a pork loin.
Recipe sources: Both these recipes came from Michael Chiarello, the host of Easy Entertaining with Michael Chiarello (that sometimes airs on the Fine Living channel). I chose to do these two recipes because I am part of the Food Network Chef Cooking Challenge that is being hosted by the writer of the I Thank My Mother blog.
What I learned: One important lesson I learned this week--and this is what I gathered from my Papa--is that pork is a hard meat to overcook. That is good to know because I rather start cooking early, put it in the oven, and forget about it!
When I was zesting the lemons I wanted to try out something I saw on the show Good Eats. Alton Brown recommended placing a layer of saran wrap on top of a cheese grater on the side that looks like little stars and grate the lemons directly onto the saran wrap. And when you were done, just remove the saran wrap and scrape off the zest. I tried it and it worked perfectly! I was afraid that the saran wrap may tear but it worked out just fine and this little trick really comes in handy for me because I am without a microplane. :( Sniff. . . I'm not really crying, I think I can do without that gadget! It's a bit too fancy for me. ;)
Any modifications? Yes, I made a few. For the tenderloin recipe I used only four lemons. Some of the people who commented on this recipe said the lemon flavor was too strong, so that's why I adjusted the amount.
And the applesauce. . . I didn't cut up apples and roast them but rather took three quarts of homemade applesauce from the freezer and used that as a base. I used two quarts of smooth and one chunky and I reduced the liquid on the stove top.
How it tasted? The pork went very well with the applesauce but I couldn't really detect a lemon flavor, unfortunately. It was a good pork, nonetheless, it had good flavor and moistness. I really liked the applesauce! I love the sweet and tart combination.
How about a 2nd time? The lemon zest didn't add much flavor to the meal. . . This lack of lemon flavor could be caused by my lemon reduction but I'm not sure. No, I don't think I will go through the trouble again of trying out this recipe. I'm satisfied with the way we roast our pork already, which is placing the pork in a pan with a little water and seasoning it liberally with salt and pepper. Its simple but it is good that way. If it ain't broke, don't fix.
I will have the applesauce again, though. It was deeelicious!


Perfect Chocolate Chip Cookies : My First "America's Test Kitchen" Recipe
3/13/10: Perfect Chocolate Chip Cookies
Last Saturday my sister and I baked some chocolate chip cookies using a recipe that was demonstrated on the PBS t.v. show, America's Test Kitchen. This show is my new favorite because it brings the chemistry of cooking to the forefront and really walks you through each step. It also includes a taste test segment as well as a kitchen utensil discussion--both things that add a special touch to the program.
We really were interested in this chocolate chip cookie recipe because the hosts boasted about the crispness of this cookie along with its chewy center. Sounded like texture heaven! They also had very unique preparation techniques that I had to try out. So let me walk you through it. . .
The Ingredients: The ingredients consisted of the usual suspects: brown and white sugar, flour, baking soda, butter, etc., but the intriguing ingredient was one hard boiled egg yolk. The hosts said that if you were to add a whole egg (uncooked) to the batter, the water-to-sugar ratio would not be correct and you wouldn't get the chewy texture that was being aimed for.
The Preparation: The way they prepared the batter was also unexpected. Instead of just throwing all the ingredients together in a bowl, they melted the butter until it was brown, added it to the sugar and whisked it for 30 seconds, allowed it to sit for 3 minutes, and repeated this step two more times. This stirring and waiting technique allows the sugar to dissolve completely which makes for a fine textured cookie and enables the cookie to form a crust fast. If a crust is formed soon after it is in the oven the center will retain its texture, thus a chewy centered cookie. The hosts mentioned that this technique was devised by accident; they said a staff member, while mixing the batter, had to walk away and answer a telephone. When he returned he noticed how thick and glossy the batter looked and the dissolved sugar factor was examined more closely. What great things come from accidents!
Any Recipe Changes? No, I made no modifications to this recipe. And for a side note. . . I used Semi-Sweet Ghirardelli Chocolate Chips.
The Tasting Panel: We did notice a difference in the cookie's flavor and texture. It had more of a rich, caramel flavor compared to the Nestlé version and the crisp outer layer and the chewy interior were there. A very good cookie and is now my new favorite chocolate chip!


Cook Status
Q: So what happened on Sunday, March 7?
A: Sorry, no cooking for me last Sunday. My family has been under the weather and I decided to take another break; I hope to try out a Michael Chiarello recipe this coming Sunday so be expecting a full post soon!
News Flash: The Next Food Network Star Winner Wins with Popovers
3/4/10: Chicken Mole and Fool-Proof Popovers
Note: No, I didn't mix up my days of the week! I was under the weather last Sunday so wasn't able to cook until Thursday.
Meal details: For the main course I made Chicken Mole, a Mexican dish that has shredded chicken and a sauce comprised of chilies, onions, chicken stock, and chocolate. And for a side, I made popovers.
Defining moments: This would be my first time making AND tasting mole sauce and popovers. Another amazing moment (and kind of funny, too!) for this time is that I recorded both of these dishes being demonstrated on T.V. That usually doesn't happen!
Recipe sources: The mole sauce is a recipe created by Marcela Valladolid, the host of the new Food Network show, Mexican Made Easy. The mole sauce was meant to be used for enchiladas, but I decided to just use it as a sauce over chicken. Easier and faster to do!
The popover recipe is from Melissa d'Arabian, the host of Ten Dollar Dinners on Food Network. I made sure I did this recipe because I am part of the Food Network Chef Cooking Challenge that is being hosted by the writer of the I Thank My Mother blog.
What I learned: I learned from doing this popover recipe that I don't need a special popover pan. All I need is a muffin pan and those I have! The finished popover may not look as nice but my family is OK with a rustic looking popover.
When I was making the popovers I ran into a scary moment. I had to brush the muffin pans with a bit of melted butter and preheat the pans in a 400 degree oven for 5 minutes. When I took out the hot pans to pour the batter in, I found the butter to be dark brown and even black in some spots!
"That isn't how it looked on T.V.," I thought. I knew there was nothing I could do at that point so I just decided to go for it. I'm glad I did because the dark butter color didn't interfere with the rising or taste of the popovers. They turned out just fine. Whew! I'm glad they did.
Oh, another little tip. Fill the muffin holes 2/3 way with batter, that's just the right amount.
I also learned about a new cheese I haven't had before. On top of the mole chicken I placed some Asiago cheese slices. Asiago cheese is made from cow's milk and can come in both fresh and aged forms; I used the fresh which melts quickly and is smooth. The fresh Asiago taste somewhat mozzarella, but a mozzarella with a bit of sharpness.
Any modifications? Yes, I made some to the chicken mole recipe.
1. First I changed the whole idea of the recipe. Instead of enchiladas I simply combined shredded chicken and mole sauce.
2. I used frozen Ancho peppers (from my family's farm) instead of dried Ancho chilies.
4. I used less peanut butter, about half the amount. I did this because when I first tasted it, I thought it was becoming too strong.
5. I used Asiago cheese on top.
6. And finally, I used a combination of semi-sweet chocolate, cinnamon, and almond extract in replace of the Mexican chocolate.
I have to point out here that I was very glad to see all the substitution suggestions Marcela has on the bottom of her recipes. It really shows that she is aware of the fact that not all grocery stores carry these over-the-border ingredients. It comes in real handy for those people (like moi) who can't find anything where I live!
How it tasted? Well, let me first begin with the good news. The popovers were GREAT. Everyone loved them. Now, about the mole sauce. Well. . . (said in an Ethel Mertz sort of way) I didn't like it much. Too extraño for me and most of the family; I sort of saw that one coming, to tell you the truth! I'm glad I tried it out and who knows maybe I will find a better recipe for mole sauce, I never had it before so I'm not sure what it is suppose to be like.
How about a 2nd time? I will certainly do the popovers again, I was very pleased with them. The mole will probably not be seeing the light of day soon. ;)


You wouldn't believe the joy on my face when I turned on the oven light and saw these through the glass window. I kept on thinking, "They worked, they worked!"

Note: No, I didn't mix up my days of the week! I was under the weather last Sunday so wasn't able to cook until Thursday.
Meal details: For the main course I made Chicken Mole, a Mexican dish that has shredded chicken and a sauce comprised of chilies, onions, chicken stock, and chocolate. And for a side, I made popovers.
Defining moments: This would be my first time making AND tasting mole sauce and popovers. Another amazing moment (and kind of funny, too!) for this time is that I recorded both of these dishes being demonstrated on T.V. That usually doesn't happen!
Recipe sources: The mole sauce is a recipe created by Marcela Valladolid, the host of the new Food Network show, Mexican Made Easy. The mole sauce was meant to be used for enchiladas, but I decided to just use it as a sauce over chicken. Easier and faster to do!
The popover recipe is from Melissa d'Arabian, the host of Ten Dollar Dinners on Food Network. I made sure I did this recipe because I am part of the Food Network Chef Cooking Challenge that is being hosted by the writer of the I Thank My Mother blog.
What I learned: I learned from doing this popover recipe that I don't need a special popover pan. All I need is a muffin pan and those I have! The finished popover may not look as nice but my family is OK with a rustic looking popover.
When I was making the popovers I ran into a scary moment. I had to brush the muffin pans with a bit of melted butter and preheat the pans in a 400 degree oven for 5 minutes. When I took out the hot pans to pour the batter in, I found the butter to be dark brown and even black in some spots!
"That isn't how it looked on T.V.," I thought. I knew there was nothing I could do at that point so I just decided to go for it. I'm glad I did because the dark butter color didn't interfere with the rising or taste of the popovers. They turned out just fine. Whew! I'm glad they did.
Oh, another little tip. Fill the muffin holes 2/3 way with batter, that's just the right amount.
I also learned about a new cheese I haven't had before. On top of the mole chicken I placed some Asiago cheese slices. Asiago cheese is made from cow's milk and can come in both fresh and aged forms; I used the fresh which melts quickly and is smooth. The fresh Asiago taste somewhat mozzarella, but a mozzarella with a bit of sharpness.
Any modifications? Yes, I made some to the chicken mole recipe.
1. First I changed the whole idea of the recipe. Instead of enchiladas I simply combined shredded chicken and mole sauce.
2. I used frozen Ancho peppers (from my family's farm) instead of dried Ancho chilies.
4. I used less peanut butter, about half the amount. I did this because when I first tasted it, I thought it was becoming too strong.
5. I used Asiago cheese on top.
6. And finally, I used a combination of semi-sweet chocolate, cinnamon, and almond extract in replace of the Mexican chocolate.
I have to point out here that I was very glad to see all the substitution suggestions Marcela has on the bottom of her recipes. It really shows that she is aware of the fact that not all grocery stores carry these over-the-border ingredients. It comes in real handy for those people (like moi) who can't find anything where I live!
How it tasted? Well, let me first begin with the good news. The popovers were GREAT. Everyone loved them. Now, about the mole sauce. Well. . . (said in an Ethel Mertz sort of way) I didn't like it much. Too extraño for me and most of the family; I sort of saw that one coming, to tell you the truth! I'm glad I tried it out and who knows maybe I will find a better recipe for mole sauce, I never had it before so I'm not sure what it is suppose to be like.
How about a 2nd time? I will certainly do the popovers again, I was very pleased with them. The mole will probably not be seeing the light of day soon. ;)


You wouldn't believe the joy on my face when I turned on the oven light and saw these through the glass window. I kept on thinking, "They worked, they worked!"

The Man with the Orange Clogs' Empanada
2/21/10: Empanadas and Easy Fruit Salad
Meal details: For the main course I made empanadas with a bacon, chorizo sausage, bell pepper, onion, and cheese filling. But these weren't your typical half moon shaped empanadas, these were of the full scale variety. And for a side dish I made a fruit salad that had pineapple, apple, oranges, bananas, and something a little different: stove-top pudding. Hmm. . . Interesting, huh?
Defining moments: It's kind of funny but this is my first time making stove-top pudding using a mix. :) I only helped stir the pot before! And this is the first time for empanadas.
Recipe sources: The empanada recipe is from Mario Batali, the host of Molto Mario and numerous other cooking shows. He is known for his exceptional knowledge of Italian cooking and of course everyone knows his scooter and orange clogs! You might remember him from the show, Mario Eats Italy. I haven't seen the show in years but that was one of the most interesting (and funny!) cooking related programs I've seen. I chose this recipe because I am part of the Food Network Chef Cooking Challenge that is being hosted by the writer of the I Thank My Mother blog. When I was searching for a Batali recipe I learned that Mario had (or does, not too sure) a show on PBS about his road trip in the great country of Spain. It is called Spain: On the Road Again. Boy, I would like to watch that!
The empanada recipe requires pizza dough and I made my own using a recipe from the 2500 Recipes from Everyday to Extraordinary cookbook. I discovered earlier while making my Le Hog Pizza that this is one great recipe!
The fruit salad recipe came from the October 2006 issue of Home Cooking Magazine. Here is the recipe for those whole are interested:
Easy Fruit Salad
What I learned: I learned what an empanada is. :) Yeah, that's always important. I sort of had a good idea of what it is but I get kind of confuse with all those calzone-type dishes. So what is it exactly? An empanada is a stuffed bread or pastry and comes from the Spanish word empanar, which means to wrap. In Spain, an empanada is usually a large circle that is cut into wedges, but in Portugal and Mexico, the empanadas are made in semi-circular shapes like the one seen here.
Did I learn anything else? None of the recipes I did this week were really foreign to me. I mean, the empanada recipe was very close to the way I prepare my BBQ Chicken Pizza; the only difference was adding another crust on top of the filling. And the fruit salad was really easy to do. So not many new techniques or ingredients this week.
Any modifications? Yes, I made modifications to both recipes. For the empanadas, I didn't roll out the dough in a circle, I just stretched the dough out to the shape of a cookie sheet. And by the way, there is a typo in the recipe. Where it says to roll out into a thin round, they mean a 14" round, not a 1/4 round. Yeah, it kind of confused me a bit! And I also substituted bacon for the pancetta and added a Monterey Jack cheese mix to the filling because my family can't have pizza without the cheese!
And for the fruit salad. I used two Clementine oranges instead of the canned mandarin oranges. And to reach the necessary amount of juice, I added some orange juice from the carton.
How it tasted? Super! Everyone enjoyed the empanadas immensely. The fruit salad was loved by some and was "OK," for others. It mainly was caused by the addition of bananas. Some don't like bananas mixed with other flavors, but for some, like me, they love it that way. So it was a sort of hit and miss recipe for this family.
How about a 2nd time? Yes, I will do both recipes again but will take away the bananas from the salad and just add more apples or oranges.


Meal details: For the main course I made empanadas with a bacon, chorizo sausage, bell pepper, onion, and cheese filling. But these weren't your typical half moon shaped empanadas, these were of the full scale variety. And for a side dish I made a fruit salad that had pineapple, apple, oranges, bananas, and something a little different: stove-top pudding. Hmm. . . Interesting, huh?
Defining moments: It's kind of funny but this is my first time making stove-top pudding using a mix. :) I only helped stir the pot before! And this is the first time for empanadas.
Recipe sources: The empanada recipe is from Mario Batali, the host of Molto Mario and numerous other cooking shows. He is known for his exceptional knowledge of Italian cooking and of course everyone knows his scooter and orange clogs! You might remember him from the show, Mario Eats Italy. I haven't seen the show in years but that was one of the most interesting (and funny!) cooking related programs I've seen. I chose this recipe because I am part of the Food Network Chef Cooking Challenge that is being hosted by the writer of the I Thank My Mother blog. When I was searching for a Batali recipe I learned that Mario had (or does, not too sure) a show on PBS about his road trip in the great country of Spain. It is called Spain: On the Road Again. Boy, I would like to watch that!
The empanada recipe requires pizza dough and I made my own using a recipe from the 2500 Recipes from Everyday to Extraordinary cookbook. I discovered earlier while making my Le Hog Pizza that this is one great recipe!
The fruit salad recipe came from the October 2006 issue of Home Cooking Magazine. Here is the recipe for those whole are interested:
Easy Fruit Salad
- 1 (3 1/2-ounce) package cook-and-serve vanilla pudding
- 1 can pineapple tidbits
- 1 apple chopped
- 1 (11 ounce) can mandarin oranges
- 3 bananas
What I learned: I learned what an empanada is. :) Yeah, that's always important. I sort of had a good idea of what it is but I get kind of confuse with all those calzone-type dishes. So what is it exactly? An empanada is a stuffed bread or pastry and comes from the Spanish word empanar, which means to wrap. In Spain, an empanada is usually a large circle that is cut into wedges, but in Portugal and Mexico, the empanadas are made in semi-circular shapes like the one seen here.
Did I learn anything else? None of the recipes I did this week were really foreign to me. I mean, the empanada recipe was very close to the way I prepare my BBQ Chicken Pizza; the only difference was adding another crust on top of the filling. And the fruit salad was really easy to do. So not many new techniques or ingredients this week.
Any modifications? Yes, I made modifications to both recipes. For the empanadas, I didn't roll out the dough in a circle, I just stretched the dough out to the shape of a cookie sheet. And by the way, there is a typo in the recipe. Where it says to roll out into a thin round, they mean a 14" round, not a 1/4 round. Yeah, it kind of confused me a bit! And I also substituted bacon for the pancetta and added a Monterey Jack cheese mix to the filling because my family can't have pizza without the cheese!
And for the fruit salad. I used two Clementine oranges instead of the canned mandarin oranges. And to reach the necessary amount of juice, I added some orange juice from the carton.
How it tasted? Super! Everyone enjoyed the empanadas immensely. The fruit salad was loved by some and was "OK," for others. It mainly was caused by the addition of bananas. Some don't like bananas mixed with other flavors, but for some, like me, they love it that way. So it was a sort of hit and miss recipe for this family.
How about a 2nd time? Yes, I will do both recipes again but will take away the bananas from the salad and just add more apples or oranges.


Oliver's "Twist" on Apple Pie
2/14/10: Cheesy Stuffed Meatballs and Appleberry Pie
Meal details: For the main course I made meatballs stuffed with mozzarella cheese to be served on top of spaghetti. And for dessert I made two apple pies, one with blueberries and orange added.
Defining moments: First time for me to make meatballs, an apple pie with additional fruit, and an apple pie made with frozen apples. Frozen apples? Learn more about me freezing Gravenstein apples here.
Recipe sources: The meatball recipe came from the cookbook, Ciao Italia - Five Ingredient Favorites by Mary Ann Esposito, the host of the Ciao Italia t.v. show. The appleberry pie recipe came from Jamie Oliver's website. Jamie Oliver is the host of The Naked Chef, Jamie's Kitchen, and Jamie at Home on the Food Network channel. I chose this appleberry pie because I am part of the FNCCC (Food Network Chef Cooking Challenge), being hosted by the writer of the I Thank My Mother blog.
I don't often see Jamie on Food Network now, and I only watched one episode of Jamie at Home. So he is one of the few chefs from Food Network that I haven't watched much!
What I learned: Hmm. . . Let me think. First off, I learned that I should take a shopping cart to the freezer when gathering the ingredients. :) You should have seen the load of freezer containers I brought up for this meal! A package of ground beef, two quarts of spaghetti sauce, three quarts of frozen apples, a quart of blueberries. . . What an armload.
Secondly, I learned that moving the ground beef to the fridge on Friday morning gives just the right amount of thawing time. I had no problem forming the meatballs.
Another thing I learned is that these pies love to spill their juices over during the baking process. I needed to place cookie sheets on the bottom rack to catch the falling juices from the two 'geysers' on the second level. :) And once the collected juices started to steam and later smoke. . . Well, you can guess the rest. Exhaust fan on full blast!
Any modifications? I made one modification to the meatball recipe. Instead of using the recommended ground chuck and sirloin, I used all ground chuck. Sirloin is a bit too expensive so that's why I made the change.
And I also made some changes to the pie recipe. To better explain what I did, here is my ingredient list: (Note: I am including cup equivalents to the gram weights and American lingo to the British lingo.)
For the pastry:
For the filling:
The appleberry pie and Gravenstein pie were both very tasty. The appleberry pie kind of surprised me because the major flavor is orange. I thought the blueberries would be the primary fruit in this pie, but it was that one orange I used! Go figure. I'm not a big orange fan so I was kind of disappointed by this. I'm glad I only used one orange instead of the suggested two, or boy, that would have been a very orange-y pie for sure. Next time I think I will either eliminate the orange altogether or just add orange juice. But for those who do like orange, go for a whole orange here.
The appleberry pie had a good amount of juice on the bottom, but from what I can tell from the recipe's picture, this is normal. It didn't affect the 'mucho' crust at all. The crust for this pie was flaky.
The Gravenstein pie was surprisingly good. The frozen apple slices I used held up well and had a good texture. Initially, I thought this pie would have applesauce for a filling; thank goodness I was wrong. The crust was less flaky than the appleberry pie but was more tender. So the addition of shortening and subtraction of butter did make a difference. Gosh, Alton Brown was right. ;)
How about a 2nd time? Yes, to both recipes. But maybe next time I'll add onions to the meatballs (I love onions, hehe) and omit the orange from the pie.


As you can see, there is a bit of juice on the bottom of the pie.

Meal details: For the main course I made meatballs stuffed with mozzarella cheese to be served on top of spaghetti. And for dessert I made two apple pies, one with blueberries and orange added.
Defining moments: First time for me to make meatballs, an apple pie with additional fruit, and an apple pie made with frozen apples. Frozen apples? Learn more about me freezing Gravenstein apples here.
Recipe sources: The meatball recipe came from the cookbook, Ciao Italia - Five Ingredient Favorites by Mary Ann Esposito, the host of the Ciao Italia t.v. show. The appleberry pie recipe came from Jamie Oliver's website. Jamie Oliver is the host of The Naked Chef, Jamie's Kitchen, and Jamie at Home on the Food Network channel. I chose this appleberry pie because I am part of the FNCCC (Food Network Chef Cooking Challenge), being hosted by the writer of the I Thank My Mother blog.
I don't often see Jamie on Food Network now, and I only watched one episode of Jamie at Home. So he is one of the few chefs from Food Network that I haven't watched much!
What I learned: Hmm. . . Let me think. First off, I learned that I should take a shopping cart to the freezer when gathering the ingredients. :) You should have seen the load of freezer containers I brought up for this meal! A package of ground beef, two quarts of spaghetti sauce, three quarts of frozen apples, a quart of blueberries. . . What an armload.
Secondly, I learned that moving the ground beef to the fridge on Friday morning gives just the right amount of thawing time. I had no problem forming the meatballs.
Another thing I learned is that these pies love to spill their juices over during the baking process. I needed to place cookie sheets on the bottom rack to catch the falling juices from the two 'geysers' on the second level. :) And once the collected juices started to steam and later smoke. . . Well, you can guess the rest. Exhaust fan on full blast!
Any modifications? I made one modification to the meatball recipe. Instead of using the recommended ground chuck and sirloin, I used all ground chuck. Sirloin is a bit too expensive so that's why I made the change.
And I also made some changes to the pie recipe. To better explain what I did, here is my ingredient list: (Note: I am including cup equivalents to the gram weights and American lingo to the British lingo.)
For the pastry:
- 500g plain flour, plus extra for dusting (4 cups All-Purpose flour)
- 100g icing sugar (3/4 cup powdered sugar)
- a pinch of salt
- 250g unsalted butter, chilled and cut into cubes (2 sticks) -- For the Gravenstein apple pie I made, I used half butter and half shortening. Wanted to try out this ratio because Alton Brown mentioned it on Good Eats last year.
- 2 large eggs
- a splash of milk
For the filling:
- 10 Granny Smith apples, peeled, cored and halved, 3 sliced -- I used Calville Blanc variety of apple for the appleberry pie and Gravenstein apples for the 100% apple pie. I didn't prepare the apples like he states here, I sliced all the apples. Why? The apples I chose don't cook down as much as Granny Smith and my family is used to slices.
- juice and zest of 2 oranges -- I used one orange.
- 7 heaped tablespoons caster sugar (granulated sugar) -- I used 5 tablespoons.
- 400g huckleberries or blueberries (2 3/4 cup) -- I used blueberries.
- 1 heaped tablespoon plain flour (All-Purpose flour)
- 1 large egg
- A small handful of demerara sugar -- I didn't use this sugar, never seen it before. I read from an internet source that this sugar is used in sweetening tea and coffee.
The appleberry pie and Gravenstein pie were both very tasty. The appleberry pie kind of surprised me because the major flavor is orange. I thought the blueberries would be the primary fruit in this pie, but it was that one orange I used! Go figure. I'm not a big orange fan so I was kind of disappointed by this. I'm glad I only used one orange instead of the suggested two, or boy, that would have been a very orange-y pie for sure. Next time I think I will either eliminate the orange altogether or just add orange juice. But for those who do like orange, go for a whole orange here.
The appleberry pie had a good amount of juice on the bottom, but from what I can tell from the recipe's picture, this is normal. It didn't affect the 'mucho' crust at all. The crust for this pie was flaky.
The Gravenstein pie was surprisingly good. The frozen apple slices I used held up well and had a good texture. Initially, I thought this pie would have applesauce for a filling; thank goodness I was wrong. The crust was less flaky than the appleberry pie but was more tender. So the addition of shortening and subtraction of butter did make a difference. Gosh, Alton Brown was right. ;)
How about a 2nd time? Yes, to both recipes. But maybe next time I'll add onions to the meatballs (I love onions, hehe) and omit the orange from the pie.


As you can see, there is a bit of juice on the bottom of the pie.

Baking Fish for the First Time
2/7/10: Baked Costa Rican-Style Tilapia with Pineapple, Black Beans, and Rice with French Bread on the Side
Meal details: For the main course I made a baked fish dish that included pineapple, black beans, rice, lemon, orange juice, and more. For a side, I baked two loaves of French bread.
Defining moments: First time for me with cooking fish (I've only eaten it before!), using black beans, and marinating.
Recipe sources: The fish recipe was created by Ingrid Hoffman, the host of Simply Delicioso on Food Network. I chose this fish recipe specifically for the FNCCC (Food Network Chef Cooking Challenge) that is being hosted by the I Blame My Mother blog. And the French bread recipe came from the February/March 2010 issue of Taste of Home magazine. Here is the recipe:
French Loaves
Any modifications? Yes, to both recipes. For the fish recipe, I didn't use cilantro (not available here right now), used bass and bluegill fillets instead of tilapia (the fish were caught by us!), and used lemons in replace of limes. I also baked it for 45 minutes instead of 30; longer baking time could have been caused by thicker fillets--not too sure. I mean, I never saw tilapia before!
For the bread recipe, I added two cups of whole wheat flour to the dough and 1 tablespoon of vital wheat gluten. The whole wheat was added because a) I like the flavor, b) more fiber and nutrients, and c), I want to use it up. The vital wheat gluten isn't really "vital" for this recipe since there is bread flour added too, but I just wanted to make sure since I've never really changed a bread recipe before.
How it tasted? I didn't find one morsel left of either! I couldn't find one complaint anywhere. The fish were moist, tender, and perfectly cooked. The rice, black beans, salsa, pineapple bottom layer was very flavorful and had wonderful texture. The bread rose and baked just fine (no problem caused by my addition of whole wheat), and it had a chewy crumb and a soft crust.
How about a 2nd time? Yes!!!!!! And maybe I'll try using some Northern Pike that my brother caught this winter. Yummy!


Meal details: For the main course I made a baked fish dish that included pineapple, black beans, rice, lemon, orange juice, and more. For a side, I baked two loaves of French bread.
Defining moments: First time for me with cooking fish (I've only eaten it before!), using black beans, and marinating.
Recipe sources: The fish recipe was created by Ingrid Hoffman, the host of Simply Delicioso on Food Network. I chose this fish recipe specifically for the FNCCC (Food Network Chef Cooking Challenge) that is being hosted by the I Blame My Mother blog. And the French bread recipe came from the February/March 2010 issue of Taste of Home magazine. Here is the recipe:
French Loaves
- 2 Tbsp. active dry yeast
- 2 cups warm water (110F to 115F)
- 2 tsp. salt
- 1 tsp. sugar
- 4 1/2 to 5 cups bread flour
- 1 tsp. cornmeal
- In a large bowl, dissolve yeast in warm water. Add the salt, sugar and 2 cups flour. Beat until smooth. Stir in enough remaining flour to form a soft dough.
- Turn onto a floured surface; kneed until smooth and elastic, about 6-8 minutes. Place in a greased bowl, turning once to grease the top. Cover and let rise in a warm place until doubled, about 1 hour.
- Punch dough down. Turn onto a lightly floured surface; divide in half. Shape into 12-in.-long loaves.
- Place seam side down on a greased baking sheet. Cover and let rise until doubled, about 30 minutes. Sprinkle with cornmeal. With a sharp knife, make four shallow slashes across the top of each loaf. Bake at 450F for 15-20 minutes or until golden brown.
Any modifications? Yes, to both recipes. For the fish recipe, I didn't use cilantro (not available here right now), used bass and bluegill fillets instead of tilapia (the fish were caught by us!), and used lemons in replace of limes. I also baked it for 45 minutes instead of 30; longer baking time could have been caused by thicker fillets--not too sure. I mean, I never saw tilapia before!
For the bread recipe, I added two cups of whole wheat flour to the dough and 1 tablespoon of vital wheat gluten. The whole wheat was added because a) I like the flavor, b) more fiber and nutrients, and c), I want to use it up. The vital wheat gluten isn't really "vital" for this recipe since there is bread flour added too, but I just wanted to make sure since I've never really changed a bread recipe before.
How it tasted? I didn't find one morsel left of either! I couldn't find one complaint anywhere. The fish were moist, tender, and perfectly cooked. The rice, black beans, salsa, pineapple bottom layer was very flavorful and had wonderful texture. The bread rose and baked just fine (no problem caused by my addition of whole wheat), and it had a chewy crumb and a soft crust.
How about a 2nd time? Yes!!!!!! And maybe I'll try using some Northern Pike that my brother caught this winter. Yummy!


Pizza Heaven
1/31/10: Le Hog Pizza and Peach and Blueberry Crumble
Meal details: For the main course I made a pizza using homemade pizza dough that was topped with a white sauce, bacon, ham, etc. For dessert, I made a crumble consisting of two of my favorite fruits: peaches and blueberries.
Defining moments: First time making a white sauce (aka cream sauce). I've seen this done many a time on tv and I was very excited to try this one out.
Recipe sources: Both recipes came via the Food Network channel. The pizza recipe is from Guy Fieri, the host of Guy's Big Bite and the crumble is from Ina Garten, the host of Barefoot Contessa--Back to Basics. I chose to do these two recipes in honor of the FNCCC (Food Network Chef Cooking Challenge) that is being hosted by the I Blame My Mother blog. Ina Garten is one of my favorite chefs so I have been looking forward to doing one of her recipes since the beginning of the challenge. The pizza dough recipe came from the basic recipe section of the 2500 Recipes from Everyday to Extraordinary cookbook. I received this cookbook as a birthday gift and it has many delicious sounding recipes in it.
What I learned: I learned a very unique way of baking pizza in the oven. The 2500 Recipe cookbook told me to place my pizza dough on a lightly oiled sheet of heavy-duty aluminum foil and stretch it to my desired diameter. I then add the pizza toppings and move the whole pizza--foil and all--to the oven. (I used a cookie sheet to transfer it.) The book says to leave the pizza on the foil for the whole baking time but when it was in the oven for 15 minutes I didn't see any browning action happening on the bottom. So as soon as the pizza was sturdy enough, I moved it to our pizza pans that have large holes on the bottom and I gave them another 15 minutes to bake. The bottom crust was then able to brown. I didn't want to put the pizza on the pizza pan at the beginning of baking because I thought it would seep through the holes. I think the foil and pan technique worked out well.
I also learned how to make a cream sauce which was unexpectedly easy. I was thinking about this sauce all week long and when it was time to make it, I was finished in a matter of 10 minutes. For some reason I was wishing the process took longer!
I didn't learn anything new from doing the crumble. I've done similar preparations in the past.
Any modifications? Yes, I made major modifications to the pizza recipe and a couple to the crumble. The pizza recipe found on the Food Network website is the scaled-down version of a recipe used in a restaurant. The recipe was scaled down drastically and, in my opinion, suffered dramatically. Proportions were way off in some places. This is my revised recipe for two 14" pizzas:
Le Hog, Revised Edition:
White Sauce recipe:
For the peach and blueberry crumble: The original recipe had ramekins in mind and since we don't have those I used a 4 quart casserole dish and tweaked the recipe. This is my ingredient list:
For the fruits:
How about a 2nd time? For sure!


Note: There was enough white sauce to cover both pizzas. I just wanted to make sure half of one pizza was done in the ''traditional'' way just in case someone didn't want to give the new sauce a go.


Meal details: For the main course I made a pizza using homemade pizza dough that was topped with a white sauce, bacon, ham, etc. For dessert, I made a crumble consisting of two of my favorite fruits: peaches and blueberries.
Defining moments: First time making a white sauce (aka cream sauce). I've seen this done many a time on tv and I was very excited to try this one out.
Recipe sources: Both recipes came via the Food Network channel. The pizza recipe is from Guy Fieri, the host of Guy's Big Bite and the crumble is from Ina Garten, the host of Barefoot Contessa--Back to Basics. I chose to do these two recipes in honor of the FNCCC (Food Network Chef Cooking Challenge) that is being hosted by the I Blame My Mother blog. Ina Garten is one of my favorite chefs so I have been looking forward to doing one of her recipes since the beginning of the challenge. The pizza dough recipe came from the basic recipe section of the 2500 Recipes from Everyday to Extraordinary cookbook. I received this cookbook as a birthday gift and it has many delicious sounding recipes in it.
What I learned: I learned a very unique way of baking pizza in the oven. The 2500 Recipe cookbook told me to place my pizza dough on a lightly oiled sheet of heavy-duty aluminum foil and stretch it to my desired diameter. I then add the pizza toppings and move the whole pizza--foil and all--to the oven. (I used a cookie sheet to transfer it.) The book says to leave the pizza on the foil for the whole baking time but when it was in the oven for 15 minutes I didn't see any browning action happening on the bottom. So as soon as the pizza was sturdy enough, I moved it to our pizza pans that have large holes on the bottom and I gave them another 15 minutes to bake. The bottom crust was then able to brown. I didn't want to put the pizza on the pizza pan at the beginning of baking because I thought it would seep through the holes. I think the foil and pan technique worked out well.
I also learned how to make a cream sauce which was unexpectedly easy. I was thinking about this sauce all week long and when it was time to make it, I was finished in a matter of 10 minutes. For some reason I was wishing the process took longer!
I didn't learn anything new from doing the crumble. I've done similar preparations in the past.
Any modifications? Yes, I made major modifications to the pizza recipe and a couple to the crumble. The pizza recipe found on the Food Network website is the scaled-down version of a recipe used in a restaurant. The recipe was scaled down drastically and, in my opinion, suffered dramatically. Proportions were way off in some places. This is my revised recipe for two 14" pizzas:
Le Hog, Revised Edition:
- Pizza dough (I used the pizza dough recipe found in this cookbook and doubled it)
- 6 meatballs, broken up
- 1 lb. chopped cooked bacon
- 10 slices of honey ham cold cut slices
- White Sauce (see recipe below)
White Sauce recipe:
- 2 tbsp. butter
- 1 large onion
- 1 clove garlic
- 3/8 cup all-purpose flour
- 3/4 cup chicken stock
- 12 oz. whipping cream
- 1/2 cup Parmesan cheese
- 1 tbsp. black pepper
For the peach and blueberry crumble: The original recipe had ramekins in mind and since we don't have those I used a 4 quart casserole dish and tweaked the recipe. This is my ingredient list:
For the fruits:
- 1 1/2 quarts of canned peaches, drained (I used the peaches I canned last year, see here to learn more)
- 2 teaspoons dried lemon peel (didn't have any lemons on hand)
- 1/2 cup sugar
- 3/8 cup all-purpose flour
- 1 quart frozen blueberries
- 1/2 cup all-purpose flour
- 1/2 cup sugar
- 3/8 cup brown sugar
- 3/4 tsp. salt
- 3/8 tsp. ground cinnamon
- 1 1/2 sticks cold butter
How about a 2nd time? For sure!


Note: There was enough white sauce to cover both pizzas. I just wanted to make sure half of one pizza was done in the ''traditional'' way just in case someone didn't want to give the new sauce a go.


Subscribe to:
Posts (Atom)


